
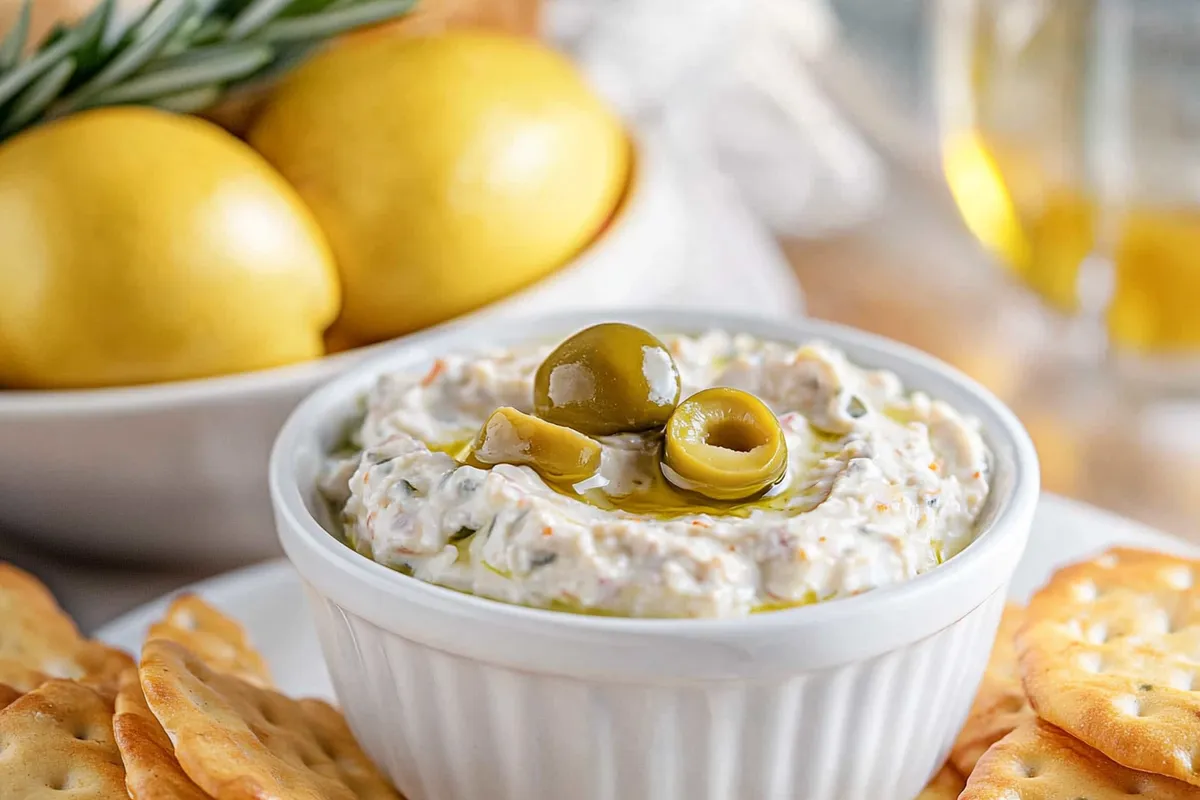
Olive Dip
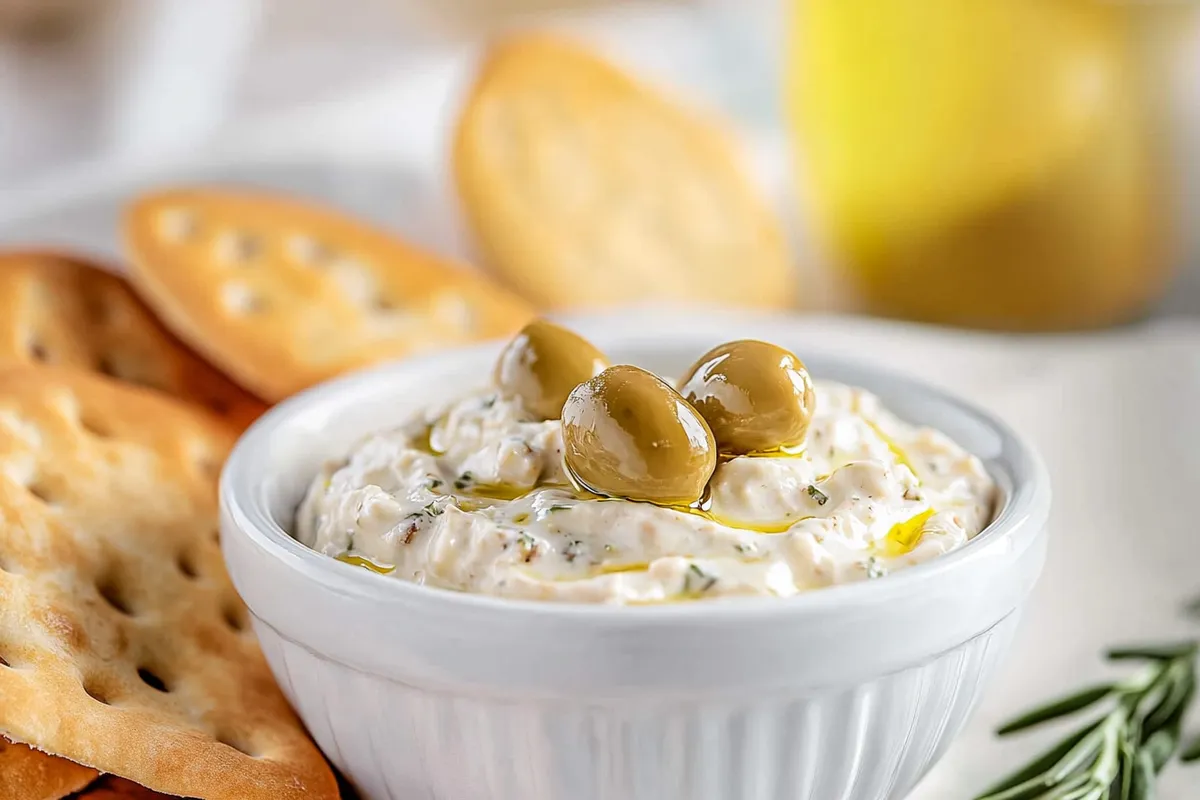
Are you ready to elevate your next gathering with a crowd-pleasing appetizer? Look no further than the delicious and versatile world of olive dip! This vibrant spread bursts with Mediterranean flavor, making it a delightful addition to any table. Whether you’re hosting a chic cocktail party or a casual family get-together, this dip is sure to impress your guests.
What’s exciting about olive dip is that it can be tailored to your taste preferences. Experiment with different types of olives, herbs, and spices to create a unique twist. Consider adding sun-dried tomatoes for a touch of sweetness or a pinch of red pepper flakes for some heat. For those looking to create a creamier texture, incorporating cream cheese or Greek yogurt can be a game changer.
For the best results, always use high-quality olives and fresh ingredients. Blending the flavors together allows for a rich depth that will tantalize the taste buds. So gather your ingredients, and get ready to dip into a world of flavor!
Ingredients for Olive Dip:
This delicious olive dip is bursting with flavor and is perfect for any gathering. Here’s what you’ll need to serve 8–10 people:
Base Ingredients:
- 2 cups of mixed olives (green and black), pitted
- 1/2 cup of cream cheese, softened
- 1/4 cup of Greek yogurt or sour cream
- 1/4 cup of olive oil
Flavor Enhancers:
- 2 tablespoons of fresh lemon juice
- 2 cloves of garlic, minced
- 1 tablespoon of fresh rosemary, finely chopped
- 1 tablespoon of fresh parsley, finely chopped
- 1 teaspoon of red pepper flakes (optional, for heat)
Seasonings:
- 1 teaspoon of dried oregano
- 1/2 teaspoon of black pepper
- 1/2 teaspoon of sea salt (adjust according to taste)
Optional Additions:
- 1/4 cup of feta cheese, crumbled (for a tangy twist)
- 1/4 cup of sun-dried tomatoes, finely chopped (for added sweetness)
- 1 tablespoon of capers, rinsed and chopped (for a briny flavor)
- 1 tablespoon of anchovy paste (for a savory depth)
Serving Suggestions:
- Pita chips or toasted baguette slices
- Fresh vegetable sticks (like celery, carrots, or bell peppers)
- Crackers of your choice for a delightful crunch
Feel free to adjust the ingredient ratios based on your personal taste preferences. If you’d like to explore different flavor profiles, consider substituting Greek olives with Kalamata olives, or adding a touch of smoked paprika for a smoky dimension. This versatility ensures that your olive dip can cater to various palates!
How to prepare Olive Dip:
Creating a delicious olive dip requires just a few simple steps. This creamy, flavorful dip is perfect for gatherings or a casual night in. Let’s get started!
Gather Ingredients for Olive Dip
First, assemble your ingredients. You will need:
- 1 cup of pitted olives (green or black, or a mix)
- 2 tablespoons of olive oil
- 1 clove of garlic, minced
- 2 tablespoons of fresh lemon juice
- 1 tablespoon of capers (optional)
- 1/4 teaspoon of red pepper flakes (optional)
- Salt and pepper, to taste
- Fresh herbs for garnish (like parsley or dill)
Prepare the Olives
Start by rinsing the olives under cold water. This will remove excess brine and reduce the saltiness of the dip.
Chop Olives Coarsely
Next, using a sharp knife, coarsely chop the olives. This helps ensure they blend nicely but still maintain some texture in the finished dip.
Blend Ingredients Together
Transfer the chopped olives to a food processor. Add the minced garlic, olive oil, and fresh lemon juice. If using, add capers and red pepper flakes at this stage.
Process Until Creamy
Pulse the mixture until it reaches a creamy consistency. Be careful not to over-process; a little texture enhances the flavor.
Taste and Adjust Seasoning
After blending, taste the dip and adjust the seasoning. If necessary, add salt, pepper, or additional lemon juice according to your preference.
Chill the Dip
Transfer the olive mixture to a serving bowl. Cover with plastic wrap and chill in the refrigerator for at least 30 minutes. Chilling allows the flavors to meld beautifully.
Garnish and Serve
Before serving, remove the dip from the refrigerator. Garnish with fresh herbs for an extra touch of color and flavor. Serve it with your choice of crackers, pita chips, or fresh veggie sticks.
Enjoy your homemade olive dip as a delightful appetizer or snack!
Tips for the Perfect Olive Dip
Creating a scrumptious olive dip is easy when you follow these helpful tips. This guide highlights essential aspects of ingredient selection, temperature maintenance, and dietary alternatives.
Quality Ingredients Matter
Using high-quality olives plays a crucial role in flavor. Choose fresh olives packed in brine rather than canned varieties for a vibrant taste. Opt for flavors like Kalamata, Castelvetrano, or green olives; each brings a unique depth. Pairing olives with fresh herbs such as parsley or basil enhances the overall profile. Freshness truly elevates your dip.
Temperature Control for Best Flavor
Serving your dip at the right temperature can make a significant difference. Cold dips may mask the richness of flavors. Let your mixture sit at room temperature for about 30 minutes before serving. This waiting time allows the ingredients to meld, enhancing the taste.
Consider Dietary Restrictions
If you need to cater to specific dietary requirements, many adaptable options exist. For a vegan olive dip, avoid using cream cheese or yogurt, and instead whip in silken tofu or cashew cream for creaminess. To make it gluten-free, always check labels on any additional seasonings or garnishes you plan to use. This ensures everyone can enjoy the dip without concern.
Perfecting Your Olive Dip Texture
Texture is key in achieving that perfect dip consistency. Blend all your ingredients until smooth, then adjust to your liking. For a chunkier texture, pulse just a few times instead of blending continuously. This provides a delightful mouthfeel, enhancing the overall eating experience.
Flavor Pairing and Variations
Experimenting with flavor combinations can create unique variations. Adding roasted garlic gives a richer flavor, while a dash of lemon juice brings brightness. For a spicy kick, incorporate a pinch of red pepper flakes. You might also consider mixing in sun-dried tomatoes or roasted red peppers for extra depth.
In summary, with the right approach to ingredient selection, attention to temperature, and smart substitutions, you can prepare an olive dip that stands out. Embrace these tips to customize your experience and enjoy a delightful dish suitable for any occasion.
Storage Tips for Olive Dip:
Keep it Fresh
To ensure your dip retains its fresh flavors, store it in an airtight container. This will prevent it from absorbing other odors from your fridge. Before sealing, press a layer of plastic wrap directly against the surface of the dip. This barrier minimizes exposure to air, which can cause oxidation and spoilage.
Optimal Temperature
Maintain the olive dip in the refrigerator, ideally at a temperature below 40°F (4°C). The cold environment helps slow down bacterial growth and keeps the ingredients fresh. Never leave the dip out at room temperature for more than two hours, as this can lead to spoilage and foodborne illness.
Freezing Options
If you have leftover dip or want to prepare it in advance, freezing is a great option. Transfer the dip into a freezer-safe container or a resealable bag, leaving some room for expansion. Olive-based dips can generally freeze well for up to three months. When ready to enjoy, thaw it in the refrigerator overnight. Stir well before serving to restore its creamy texture.
Check for Freshness
Regularly check your dip for signs of spoilage. Look for changes in color, texture, or smell. If you notice an off odor or mold, discard it immediately. Always label your container with the date you made it, as this helps you keep track of its freshness. Generally, a well-stored dip lasts about one week in the refrigerator.
Using Ingredients Wisely
When preparing your dip, consider the shelf stability of the ingredients. Using fresh herbs or ingredients like garlic can enhance flavor but may shorten shelf life. Instead, opt for dried herbs or pre-packaged garlic products that typically have a longer shelf life. This simple switch can help maintain the overall freshness of your dip.
By following these straightforward storage tips, you can enjoy your olive dip for longer while keeping it delicious and safe. Staying mindful of storage practices ensures that you savor every bite!
Related Recipes to Enhance Your Olive Dip Experience
If you love olive dip, you’ll find several other recipes that complement its rich, savory flavors. These dishes feature similar ingredients and enhance your gatherings with delightful tastes and textures.
One great option is a Mediterranean Hummus. Like olive dip, hummus features bold flavors and a creamy texture. It typically includes tahini, chickpeas, and garlic, offering a lovely contrast to the briny taste of olives. Serve hummus alongside crackers or pita bread, just like you would with the olive dip, making it easy for guests to mix and match.
Another fantastic choice is Stuffed Grape Leaves. These small, grape leaf-wrapped parcels are filled with rice, herbs, and spices. The subtle tanginess of the grape leaves works beautifully with the salted flavor of oranges. Both dishes bring a taste of the Mediterranean to your table, creating a cohesive themed spread.
For something a little different, consider adding a Spinach and Feta Spread. This spread combines fresh spinach with creamy feta cheese, providing a bright green color and a fresh taste. Similar to olive dip, this dish is easy to whip up and serves as a tasty appetizer.
Lastly, pair your olive dip with Charcuterie Board Essentials. Consider including cured meats, various cheeses, nuts, and seasonal fruits. The diversity of flavors and textures allows guests to create their combinations while enjoying the rich bite of olives.
Incorporating these recipes will surely elevate your appetizer offerings and keep everyone coming back for more!
Frequently Asked Questions:
What ingredients are typically used in a classic olive dip?
Many recipes for olive dip feature a blend of black and green olives, garlic, olive oil, lemon juice, and fresh herbs like parsley or basil. Some variations may also include cream cheese, feta, or yogurt to add creaminess and depth to the flavor profile. This combination of ingredients results in a deliciously rich and savory spread, perfect for dipping.
How can I make olive dip vegan?
Creating a vegan version of olive dip is quite simple. You can skip any cheese or dairy components and focus on using high-quality olives combined with olive oil, garlic, lemon juice, and fresh herbs. A splash of balsamic vinegar can also enhance the taste and add a unique twist to this plant-based spread.
What are some great pairings for olive tapenade?
Olive tapenade complements a wide array of accompaniments. You can serve it with crusty bread, pita chips, or vegetable sticks for dipping. It also pairs wonderfully with grilled meats, fish, or as a topping for bruschetta. Adding it to a cheese platter makes for a delightful and sophisticated sharing option.
Can I make olive dip ahead of time?
Yes, olive dip is an excellent dish to prepare in advance. The flavors tend to meld and deepen when left to sit, so whipping it up a day or two ahead of your event can enhance its taste. Just remember to store it in an airtight container in the refrigerator to maintain freshness.
How should I store leftover olive dip?
To keep your leftover dip fresh, transfer it to an airtight container and place it in the fridge. It should last for about three to five days, depending on the ingredients used. If you notice any discoloration or off smell, it’s best to discard it for safety reasons.
Is olive dip suitable for gluten-free diets?
Absolutely! Most olive dip recipes are inherently gluten-free since the primary ingredients—olives and seasonings—do not contain gluten. However, when serving, ensure that your dipping options, like chips or bread, are labeled gluten-free to accommodate those with dietary restrictions.
Conclusion:
In summary, this delightful dip is a fantastic addition to your entertaining repertoire. The beauty of this olive dip lies in its simplicity; using just a handful of ingredients, you can whip up a crowd-pleasing appetizer in no time. Moreover, the flexibility of this recipe allows for endless customization. Feel free to experiment with various olives, add roasted peppers, or even incorporate cream cheese for a creamier texture. Whether served as a spread on crackers, a dip for fresh veggies, or a topping for grilled meats, this dip caters to various tastes and occasions. With unique flavors and an appealing presentation, it guarantees to impress your guests. So, gather your ingredients and get creative—the perfect olive dip awaits you, ready to elevate your next gathering!
Print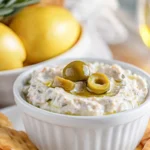
Olive Dip
- Total Time: 40 minutes
- Yield: 8 servings 1x
Description
This Creamy Olive Dip is a rich, tangy, and flavorful appetizer perfect for parties or snacking! Made with green and black olives, cream cheese, and seasonings, it’s a quick and easy dip that pairs perfectly with crackers, pita chips, or fresh veggies.
Ingredients
- 8 oz cream cheese, softened
- ½ cup mayonnaise
- ½ cup sour cream
- 1 cup green olives, chopped
- ½ cup black olives, chopped
- 1 clove garlic, minced
- ½ tsp dried oregano
- ¼ tsp black pepper
- ¼ tsp red pepper flakes (optional, for a little heat)
- 1 tbsp fresh parsley, chopped (for garnish)
Instructions
1️⃣ Mix the Base – In a bowl, beat cream cheese, mayonnaise, and sour cream until smooth and creamy.
2️⃣ Add the Olives – Stir in chopped green and black olives, garlic, oregano, black pepper, and red pepper flakes. Mix well.
3️⃣ Chill & Serve – Refrigerate for 30 minutes for the flavors to meld. Garnish with fresh parsley and serve with crackers or veggies.
Notes
✔ For extra tang, add 1 tbsp lemon juice or a splash of olive brine.
✔ Make it spicy by adding diced jalapeños or extra red pepper flakes.
✔ Best served chilled!
- Prep Time: 10 minutes
- Cook Time: 30 minutes
Nutrition
- Calories: 150
- Fat: 15g
- Carbohydrates: 2g
- Protein: 2g