
Oreo Earthquake Cake
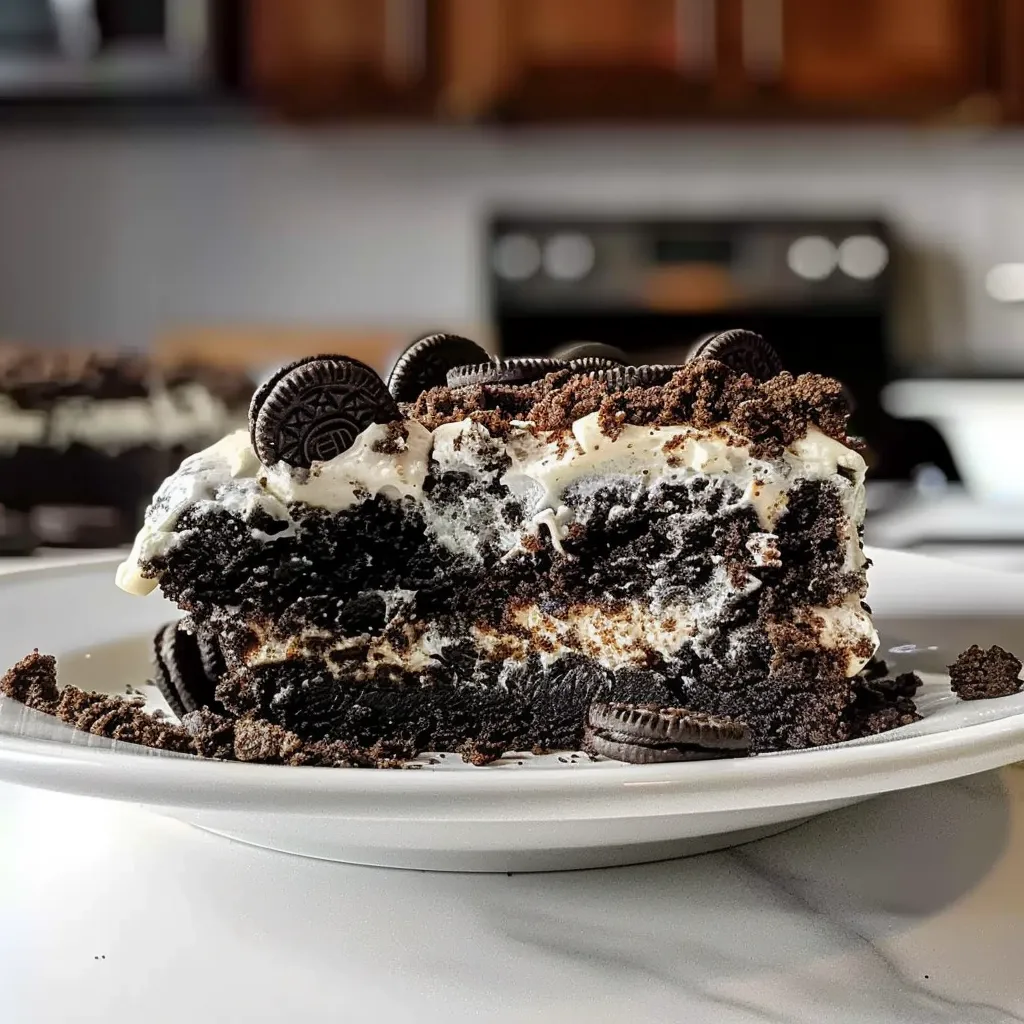
Get ready to indulge in a dessert that promises to shake up your taste buds: the Oreo Earthquake Cake! This decadent treat combines the classic flavors of rich chocolate and creamy cream cheese, creating an irresistible dessert that’s perfect for any occasion. With its gooey chocolate center and crushed Oreo topping, it’s no wonder this cake has become a fan favorite among dessert enthusiasts.
One of the best things about this recipe is its versatility. Want to spice things up? Try adding a layer of peanut butter or peppermint extract for a unique twist. You could even experiment with different types of cookies to switch up the flavors!
To ensure your Oreo Earthquake Cake comes out flawless, be sure to use room-temperature ingredients for a smoother batter, and don’t skimp on the baking time—an undercooked center enhances that signature “earthquake” effect. Get ready to wow your friends and family with this stunning and sensational dessert!
Ingredients for Oreo Earthquake Cake:
This decadent cake combines rich chocolate cake with creamy layers, all topped with delicious Oreos. Perfect for parties or a special treat!
Cake Base:
- 1 box (15.25 oz) chocolate cake mix
- 1 cup water
- 1/2 cup vegetable oil
- 3 large eggs
Oreo Filling:
- 8 oz cream cheese, softened
- 1/2 cup unsalted butter, softened
- 1 cup powdered sugar
- 1 teaspoon vanilla extract
- 10-12 Oreo cookies, roughly crushed
Chocolate Topping:
- 1 cup semi-sweet chocolate chips
- 1/2 cup heavy cream
- 6-8 Oreo cookies, crumbled (for decoration)
Optional Variations:
- For a peanut butter twist, substitute half of the cream cheese with 4 oz peanut butter.
- To create a mint chocolate version, add 1/2 teaspoon of peppermint extract to the filling.
- Replace regular Oreos with flavored varieties such as birthday cake or mint Oreos for a fun twist.
Feel free to mix and match these ingredients based on your preferences to create your perfect version. The foundation of chocolate cake pairs wonderfully with any of these variations, ensuring a delightful treat for all chocolate lovers!

How to prepare Oreo Earthquake Cake:
Follow these simple steps to create a decadent Oreo Earthquake Cake that will impress everyone. Gather all your ingredients and tools before you begin for a smooth baking experience.
Step 1: Preheat and Prepare
Preheat your oven to 350°F (175°C). This step ensures that your cake bakes evenly.
Step 2: Grease the Pan
Grease a 9×13-inch baking dish with butter or non-stick cooking spray. This will help prevent the cake from sticking.
Step 3: Mix the Cake Batter
In a large mixing bowl, combine the cake mix with eggs, water, and oil. Use an electric mixer or a whisk to beat the ingredients together until smooth.
Step 4: Add the Cream Cheese
In a separate bowl, beat together softened cream cheese, powdered sugar, and vanilla extract until creamy. This will create your delicious filling.
Step 5: Pour the Cake Batter
Pour half of the cake batter into the prepared baking dish. Spread it evenly with a spatula.
Step 6: Add the Cream Cheese Mixture
Spoon dollops of the cream cheese mixture over the first layer of batter. Aim for even distribution but do not swirl it in yet.
Step 7: Layer with Oreos
Add crushed Oreo cookies on top of the cream cheese dollops. This adds texture and flavor to your cake.
Step 8: Top with Remaining Batter
Carefully pour the remaining cake batter over the Oreo layer. Make sure to cover the Oreos evenly without disturbing them too much.
Step 9: Bake the Cake
Place the baking dish in the preheated oven and bake for 35-40 minutes. Keep an eye on it; the cake should be set and slightly golden on top.
Step 10: Cool and Serve
Once baked, remove the cake from the oven. Allow it to cool in the pan for about 10 minutes. Then, transfer it to a wire rack to cool completely before serving.
Enjoy your mouthwatering creation! The combination of gooey cream cheese and crunchy Oreos is simply irresistible.
Tips for the Perfect Oreo Earthquake Cake
Maintain the Correct Temperature
For a successful Oreo Earthquake Cake, start by ensuring that your oven is preheated to the correct temperature. Use an oven thermometer to verify this, as ovens can often be off by several degrees. Bake the cake at 350°F (175°C) until a toothpick inserted in the center comes out clean, which usually takes about 30 to 35 minutes. If you know your oven runs hot or cold, adjust the baking time accordingly. Also, let your cake cool in the pan for at least 10-15 minutes before transferring it to a wire rack. This helps prevent breakage.
Use Quality Ingredients
Choosing the right ingredients can make a big difference in taste and texture. Opt for fresh eggs, high-quality chocolate cake mix, and full-fat cream cheese for the filling. The cream cheese adds richness that enhances the cake’s flavor. When it comes to Oreos, using regular ones, not double-stuffed, keeps the proportions balanced. Additionally, using real butter instead of margarine contributes to a richer taste. Always avoid expired or low-quality products, as they can affect the final outcome.
Make Suitable Substitutions
If you have dietary restrictions, don’t worry. You can easily make substitutions to accommodate everyone. To create a gluten-free version, use a gluten-free chocolate cake mix. For a dairy-free option, substitute the cream cheese with a dairy-free alternative or even a nut-based cheese. Additionally, coconut cream can serve as a great substitute for a rich and creamy filling without dairy. If you need an egg-free recipe, consider using unsweetened applesauce—about 1/4 cup can replace one egg.
Enhancing Flavor and Texture
Add extra treats to boost flavor. Toss in a handful of chocolate chips or nuts to the batter for added texture. For more Oreo flavor, crumble some on top before baking. You can also experiment with different flavors of cake mix or Oreos, like red velvet or mint. Another way to elevate the cake is to drizzle it with chocolate ganache after it has cooled. This will not only taste great but will look beautiful and glossy as well.
Finally, always serve your cake with a scoop of vanilla ice cream on the side for a delightful contrast of flavors and textures. Enjoy your baking adventure!
Storage Tips for Oreo Earthquake Cake:
To ensure your Oreo Earthquake Cake remains fresh and delicious, follow these storage tips. Proper storage can help preserve its flavor, texture, and moistness for an extended period.
Optimal Storage Conditions
First, let the cake cool completely at room temperature before you store it. This helps prevent moisture buildup, which can lead to a soggy texture. Once cooled, consider placing the cake in an airtight container. A sealable plastic container or a cake dome works well to keep air out and moisture in.
For short-term storage, you can leave the cake at room temperature. Maintain it in a cool, dry place away from direct sunlight. This method helps preserve the flavors and will keep the cake fresh for up to three days.
Refrigeration and Its Effects
If you need to store the cake for a longer period, refrigerate it. Wrap the cake securely in plastic wrap or aluminum foil before placing it in the refrigerator. This prevents the cake from drying out and absorbing any odors from other items in the fridge. When stored properly, the cake can last up to one week in the refrigerator.
Freezing for Long-Term Storage
For even longer preservation, consider freezing the cake. Cut it into individual slices for easy access. Wrap each slice tightly in plastic wrap, followed by a layer of aluminum foil. This double-wrapping method ensures it remains fresh while frozen. Store the wrapped slices in a freezer-safe bag or container. Your cake can last up to three months in the freezer.
When you’re ready to enjoy frozen slices, transfer them to the fridge for several hours or overnight to thaw. You can also let them sit at room temperature for about 30 minutes. Avoid using a microwave to defrost, as this can alter the cake’s texture.
Checking for Freshness
Always check for signs of spoilage before consumption. Mold or an off smell indicates that the cake is no longer safe to eat. Trust your senses; when in doubt, throw it out!
By following these storage tips, you can keep your cake fresh and ready to delight at any moment, maximizing its enjoyment!
Related Recipes to Oreo Earthquake Cake
If you love the rich flavors and satisfying textures of Oreo Earthquake Cake, you might enjoy these complementary desserts. Each recipe shares similar elements, making them perfect companions for your sweet tooth.
- Chocolate Lava Cake – This dessert features a warm, gooey center that pairs wonderfully with cookies. The decadent chocolate flavor harmonizes with the creaminess of the crushed Oreo cookies, creating a delightful contrast. Serve it with ice cream for a creamy finish.
- Cookie Dough Brownies – Combining soft brownies with edible cookie dough creates a layered delight. The chewy brownie base complements the crunchy Oreo pieces in the cake, resulting in a deliciously indulgent treat.
- Peanut Butter Swirl Brownies – These brownies, with their rich peanut butter flavor, can balance the sweetness of the cake. The nutty taste enhances the cookies’ chocolaty goodness and adds a unique twist to your dessert lineup.
- Cookies and Cream Cheesecake – This cheesecake made with crushed cookies mirrors the essence of the cake. Its creamy texture, combined with crunchy bits of Oreo, creates a delightful, rich experience that chocolate and cookie lovers will adore.
These recipes not only complement the flavors found in Oreo Earthquake Cake but also expand the variety of textures and tastes in your dessert menu. Each one offers its unique twist while still fitting perfectly into a cookie-inspired theme.
Frequently Asked Questions:
What is an Oreo Earthquake Cake?
The Oreo Earthquake Cake is a decadent dessert that combines chocolate cake mix with a rich cream cheese layer and crushed Oreo cookies. It’s known for its gooey texture and delightful contrast between the rich filling and the cake exterior, offering an indulgent slice of heaven that chocolate lovers adore.
How do I make Oreo Earthquake Cake from scratch?
To create this scrumptious dessert from the ground up, start with a base of homemade chocolate cake batter. Blend cake flour, cocoa powder, sugar, baking powder, and salt. Then, pour half of the batter into a greased baking pan, layer with a mixture of cream cheese, sugar, and crushed Oreos, and top with the remaining batter. Bake until set, allowing the unique layers to develop a distinctive flavor profile.
Can I use other cookies instead of Oreos?
Certainly! While Oreos are the classic choice for this type of cake, you can experiment with other cookies, such as chocolate sandwich cookies, peanut butter cookies, or even graham crackers. The key is to maintain the contrast of textures and flavors that defines this delightful dessert.
How long does Oreo Earthquake Cake last?
When stored properly in an airtight container, this chocolatey delight can last about 3 to 5 days at room temperature. Refrigeration may extend its freshness for up to a week, but it’s best enjoyed within the first few days for optimal taste and texture.
Can I freeze Oreo Earthquake Cake?
Yes, you can freeze this delightful cake! Just ensure it is completely cooled and wrapped securely in plastic wrap, followed by aluminum foil. It can be kept in the freezer for up to 3 months. When you’re ready to enjoy it, thaw it in the refrigerator overnight before serving.
Is there a way to make a gluten-free version of this cake?
Absolutely! You can easily adapt the Oreo Earthquake Cake recipe to be gluten-free by using a gluten-free chocolate cake mix and ensuring that the Oreos or any cookie substitutes are made without gluten. This way, everyone can enjoy this delicious treat without dietary restrictions.
Conclusion:
In summary, the delectable Oreo Earthquake Cake combines ease and flexibility, making it the perfect dessert for any occasion. This recipe offers a straightforward approach to creating a flavorful treat that captivates with its unique blend of textures. Throughout the preparation, we’ve highlighted customizable options that allow you to personalize the cake with your favorite ingredients, whether it’s adding nuts, adjusting the sweetness, or experimenting with various types of cookies. By using simple pantry staples and following the easy steps, you’ll be rewarded with a show-stopping dessert that’s not only visually appealing but also irresistibly delicious. This cake truly shines as a versatile option, capable of being tailored to suit your tastes, making the Oreo Earthquake Cake a household favorite that you’ll want to revisit time and again.
Print
Oreo Earthquake Cake
- Total Time: 55 minutes
- Yield: 12 servings 1x
Description
A Rich, Chocolatey, and Decadent Delight
This Oreo Earthquake Cake is an irresistible, gooey, and chocolate-filled cake that combines the crunch of Oreos with a rich, creamy center. It’s a dessert that’s as fun to make as it is to eat, with a texture that’s both cakey and fudgy!
Ingredients
-
1 box (15.25 oz) chocolate cake mix (plus ingredients to make the cake)
-
1 package (8 oz) cream cheese, softened
-
½ cup butter, melted
-
1 cup powdered sugar
-
½ cup sour cream
-
1 tsp vanilla extract
-
15–20 Oreo cookies, broken into chunks
-
1 cup chocolate chips (optional, for extra chocolatey goodness)
Instructions
-
Preheat oven to 350°F (175°C). Grease a 9×13-inch baking dish.
-
Prepare the chocolate cake mix according to package instructions and pour into the prepared baking dish.
-
In a mixing bowl, beat together softened cream cheese, melted butter, powdered sugar, sour cream, and vanilla until smooth.
-
Drop spoonfuls of the cream cheese mixture over the cake batter. Gently swirl it into the batter using a knife (do not fully mix).
-
Sprinkle broken Oreo chunks evenly over the top of the cake.
-
Optionally, sprinkle chocolate chips over the top for extra chocolatey goodness.
-
Bake for 35–40 minutes, or until the cake is set around the edges but slightly gooey in the middle.
-
Let cool before serving.
Notes
-
The cake will have a “lava-like” effect, with gooey pockets of cream cheese and chocolate.
-
Serve warm with a scoop of vanilla ice cream for an extra indulgent treat.
-
For a twist, add peanut butter chips or crushed nuts along with the Oreos.
- Prep Time: 15 minutes
- Cook Time: 40minutes
Nutrition
- Calories: 350 kcal
- Sugar: 30g
- Fat: 18 g
- Carbohydrates: 45 g
- Protein: 3g