
Butterfinger Balls: Deliciously Easy No-Bake Treats
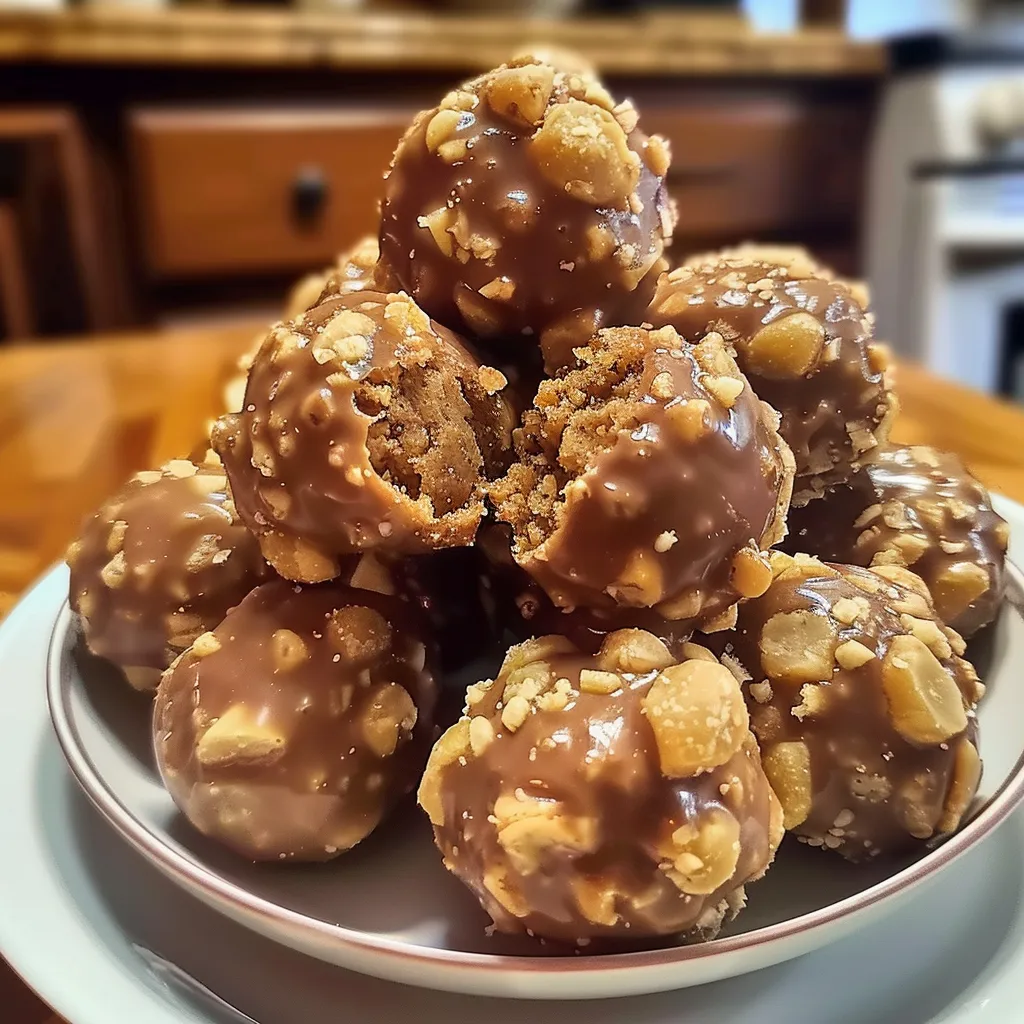
If you’re searching for a delectable treat that brings together the charm of childhood flavors and adult indulgence, look no further than these irresistible Butterfinger Balls. These sweet bites capture the crunchy, peanut buttery essence of your favorite candy bar, transforming it into a simple, homemade delight that’s perfect for any gathering or a satisfying snack.
What’s more, the versatility of this recipe invites endless creativity! Feeling adventurous? Consider adding shredded coconut or a sprinkle of sea salt for an unexpected twist. Or, try dipping these bites in dark chocolate for a richer flavor profile that balances the sweetness beautifully.
For those aiming for a new level of perfection, a few essential tips can elevate your creations. Be sure to chill the mixture thoroughly before rolling, ensuring every bite has the perfect texture. With these expert insights, you’ll not only impress your guests but also find that making Butterfinger Balls becomes a cherished tradition in your kitchen. So let’s dive into this sweet adventure together!
Ingredients for Butterfinger Balls:
To create a delightful batch of Butterfinger Balls that serves 8 to 10 people, you’ll need the following ingredients:
Base Ingredients:
- 1 cup creamy peanut butter
- 1 cup crushed Butterfinger candy bars (about 3-4 bars)
- 2 cups graham cracker crumbs
- 1/2 cup powdered sugar
Chocolate Coating:
- 2 cups semi-sweet chocolate chips
- 1 tablespoon coconut oil or shortening (to help with melting)
Optional Toppings:
- 1/4 cup additional crushed Butterfinger pieces (for rolling or garnishing)
- 1/4 cup crushed peanuts (for added crunch)
- 1 teaspoon sea salt (to sprinkle on top, if you enjoy a sweet and salty blend)
Flavor Variations:
If you’re looking to put a twist on your Butterfinger confections, consider the following alternatives:
- Replace the creamy peanut butter with crunchy peanut butter for a varied texture.
- For a sweeter flavor, swap out some of the graham cracker crumbs with vanilla wafers.
- To enhance the chocolate flavor, use dark chocolate chips instead of semi-sweet.
- Add a dash of vanilla extract to the mixture for extra depth in flavor.
These ingredients come together to make a delectable treat that’s perfect for parties, holidays, or just a sweet indulgence any day of the week. Enjoy preparing this easy recipe!

How to prepare Butterfinger Balls:
Making Butterfinger Balls is a simple and fun process. Follow these clear steps to create your delightful treats!
Gather Your Ingredients
Start by collecting all necessary ingredients. You will need one cup of crushed Butterfinger candy bars, one cup of creamy peanut butter, and two cups of graham cracker crumbs. Additionally, have some melting chocolate and sprinkles ready for coating.
Combine the Base Ingredients
In a large mixing bowl, combine the crushed Butterfinger bars, peanut butter, and graham cracker crumbs. Stir the mixture until all ingredients are thoroughly blended. The mixture should be sticky yet manageable for shaping.
Shape the Balls
Once everything is mixed well, use your hands to form small balls. Aim for about one inch in diameter for each ball. Lay them out on a wax paper-lined baking sheet. Space them evenly, leaving room to prevent sticking.
Chill Before Coating
Place the baking sheet in the refrigerator for about 30 minutes. This chilling step allows the balls to firm up, making them easier to coat with chocolate.
Melt the Chocolate
While the balls chill, melt your chocolate. You can do this in a microwave-safe bowl. Heat the chocolate in 30-second intervals, stirring in between until it is fully melted and smooth.
Coat the Chilled Balls
Remove the chilled balls from the refrigerator. Dip each ball into the melted chocolate. Ensure the entire surface is covered. Use a fork to lift each ball out, letting excess chocolate drip off.
Add Sprinkles for Extra Flavor
Once coated, place the chocolate-covered balls back on the wax paper. If desired, sprinkle them with colorful toppings or crushed nuts while the chocolate is still warm and sticky.
Cool the Treats
Allow the Butterfinger treats to set completely at room temperature. If you prefer, place the sheet back in the fridge to speed up the process. Once the chocolate is firm, your treats are ready to enjoy!
Serve these delicious Butterfinger Balls as a snack or dessert. They’re sure to be a hit with family and friends!
Tips for the Perfect Butterfinger Balls
Maintain Ideal Temperatures
To create perfectly textured treats, keep an eye on temperatures. When melting the chocolate for coating, use a double boiler or microwave at 50% power. Heating the chocolate slowly helps prevent burning. If it gets too hot, it can seize up. Aim for a smooth, pourable consistency. After forming the balls, chill them in the fridge before dipping. Cold balls help the chocolate solidify quickly and adhere better.
Use Quality Ingredients
The flavor of your Butterfinger-inspired treats relies heavily on the ingredients you choose. Use high-quality chocolate that melts well for coating. Dark chocolate, milk chocolate, or white chocolate all work, but avoid cheap varieties. They often contain fillers that affect taste and texture. Likewise, use creamy peanut butter for a richer flavor. Natural peanut butter contains less sugar and adds a nice texture, enhancing your treats further.
Dietary Substitutions for Butterfinger Balls
If dietary restrictions apply, there are some easy substitutions. For a gluten-free option, make sure the ingredients, especially any powdered sugar, are certified gluten-free. If dairy is a concern, look for dairy-free chocolate chips. These varieties are widely available and melt well. Additionally, consider using almond butter or sunflower seed butter as a nut-free alternative. This change will cater to those with nut allergies while keeping great taste.
Customize Your Coating
Dipping in melted chocolate is traditional, but you can get creative with your coatings. Instead of using just chocolate, try rolling the balls in crushed nuts, sprinkles, or shredded coconut for extra texture. You can also mix different types of chocolate for a swirled effect. This not only looks appealing but also adds depth to the flavor profile.
Portion Control and Storage Tips
Creating uniform-sized balls helps in cooking evenly. Use a cookie scoop to maintain consistency. After preparation, store them in an airtight container in the fridge. This keeps them fresh for longer and maintains their firm texture. For longer storage, consider freezing them. Just make sure they are well-wrapped to avoid freezer burn while retaining their crunch and flavor.
By following these tips, you’ll ensure your treats are delicious, creative, and adaptable to various tastes or dietary needs. Enjoy making your delightful sweet bites!
Storage Tips for Butterfinger Balls:
Keeping your homemade treats fresh and tasty requires proper storage. Here are some practical tips to ensure your Butterfinger Balls maintain their delightful flavors and textures.
Optimal Storage Conditions
To preserve freshness, store your Balls in an airtight container. This prevents moisture and air from affecting the texture and flavor. Make sure the container is clean and dry before placing the treats inside. If you don’t have an airtight container, you can use plastic wrap or aluminum foil to wrap each ball individually. This provides a protective barrier against environmental factors.
The Ideal Temperature
Store your treats in a cool, dry place. A pantry or cupboard away from direct sunlight works well. Avoid keeping them in warm places like near the stove or oven, as heat can cause them to melt or spoil. For longer-lasting freshness, consider refrigerating your Butterfinger Balls. The cold environment helps maintain their shape and integrity while extending their shelf life.
Freezing for Extended Shelf Life
If you plan to keep your treats for an extended period, freezing is a fantastic option. Place the balls in a single layer on a baking sheet and freeze them for about two hours. Once solid, transfer them to a freezer-safe bag or container. Label with the date so you can monitor how long they’ve been stored. They can typically maintain quality for up to three months in the freezer.
Thawing Your Treats
When you’re ready to enjoy your Butterfinger Balls after freezing, remove the desired amount from the freezer and let them sit at room temperature for about 15-20 minutes. This gentle thawing prevents any condensation from making them soggy. You can also place them in the refrigerator if you prefer a slower thawing process.
Monitor for Freshness
If you are storing your treats at room temperature, consume them within a week for the best flavor and texture. Monitor for any changes in taste or appearance, as homemade treats may not have the preservatives found in store-bought versions.
By following these guidelines, you can enjoy your Butterfinger Balls at their best quality, ensuring that they remain delicious for as long as possible.
Related Recipes to Butterfinger Balls
If you love the rich, peanut buttery goodness of Butterfinger Balls, you may want to try these related recipes. They all share a similar flavor profile or texture, making them perfect companions for your indulgent treat.
1. Chocolate Peanut Butter Truffles
These truffles combine the smooth, creamy taste of peanut butter with a rich chocolate coating. Just like Butterfinger Balls, they provide a satisfying crunch from the chocolate exterior and a delightful center. You can roll them in cocoa powder or crushed nuts for added texture, enhancing their appeal.
2. Peanut Butter Cookies
Peanut butter cookies are a classic dessert that harmonizes beautifully with the flavors found in Butterfinger Balls. They offer a soft, chewy texture that contrasts with the crunch of candy. Enjoy them fresh from the oven, paired with a glass of cold milk, for a delightful treat that highlights the same nutty goodness.
3. Chocolate-Covered Rice Crispy Treats
Combine the crispy texture of rice cereal with marshmallow sweetness and finish with a chocolate coating. These treats share a fun crunch and satisfy that sweet tooth. They are also incredibly simple to make and can be modified easily, allowing you to create your own unique version.
4. No-Bake Oreo Balls
These sweet bites consist of crushed Oreos mixed with cream cheese, rolled into balls, and coated in chocolate. They mirror the no-bake nature of Butterfinger Balls and bring a rich, buttery flavor that complements the same chocolatey crunch.
These recipes connect through their textures and flavors, enabling you to build a delightful dessert spread or simply enjoy them alongside your Butterfinger-inspired treat. Each recipe offers a unique twist while keeping that familiar taste you love.
Frequently Asked Questions:
What exactly are Butterfinger Balls?
Butterfinger Balls are delightful no-bake treats made from a mixture of crushed Butterfinger candy bars, creamy peanut butter, and confectioners’ sugar, all rolled into bite-sized spheres. These sweet morsels are typically coated in melted chocolate for an extra indulgent touch, making them a favorite among candy lovers and dessert enthusiasts alike.
How long does it take to prepare Butterfinger Chocolate Balls?
The preparation time for these delicious treats is quite short, usually taking about 15 to 20 minutes. Following this, you’ll need to chill them in the refrigerator for about an hour or until firm, after which they can be enjoyed. The process is simple and can be done quickly, making them perfect for last-minute gatherings or a sweet snack whenever you crave something decadent.
Can I use other candy bars instead of Butterfinger?
Certainly! While the classic version revolves around Butterfinger, you can experiment with various candy bars to create different flavored balls. Options like Reese’s Peanut Butter Cups or Snickers can be used to provide unique tastes and textures, allowing you to customize your treats to your liking.
How should I store these sweet treats?
To ensure the freshness of Butterfinger Balls, it is best to store them in an airtight container. You can keep them in the refrigerator for up to two weeks. If you want to maintain their quality for a longer period, consider freezing them for up to three months and thawing them before serving.
Are Butterfinger Balls suitable for special diets?
While traditional Butterfinger Balls may not cater to all dietary restrictions, modifications can be made. To make them gluten-free, ensure that all ingredients are certified gluten-free. For a vegan version, you can substitute chocolate with dairy-free options and use plant-based alternatives for the peanut butter depending on your preferences.
What occasions are Butterfinger Confectionery Balls ideal for?
These treats are perfect for a variety of occasions, such as birthday parties, holiday celebrations, or just as a delightful snack for movie nights. Their appealing presentation and delicious taste make them an excellent choice for sharing with friends and family, bringing joy to any gathering with their irresistible flavor.
Conclusion:
Indulging in the delightful world of Butterfinger Balls is a simple and rewarding experience. This no-bake treat allows for flexibility in ingredients, making it easy to adapt to your personal taste. The recipe combines the irresistible crunch of Butterfinger with creamy peanut butter and velvety chocolate—the perfect balance for any sweet tooth. Remember, you can customize these bites by experimenting with various toppings or even incorporating other favorite candies for a unique twist. Assembling Butterfinger Balls requires minimal time and effort, making them an excellent choice for last-minute gatherings or satisfying cravings. With their appealing presentation and delectable flavor, these treats are sure to impress anyone who tries them. Embrace creativity in your kitchen and enjoy the delightful journey of creating your own Butterfinger-inspired treats!
Print
Butterfinger Balls: Deliciously Easy No-Bake Treats
- Total Time: 45 minutes
- Yield: 24 balls 1x
Description
These no-bake Butterfinger Balls are a delightful mix of creamy peanut butter, crunchy Butterfinger bits, and smooth chocolate. Perfect for parties, gifts, or an indulgent snack!
Ingredients
- 1 cup creamy peanut butter
- ½ cup unsalted butter, softened
- 2 cups powdered sugar
- 1 ½ cups crushed Butterfinger candy bars
- 12 oz chocolate melting wafers or semi-sweet chocolate chips
Instructions
- In a bowl, mix peanut butter and butter until smooth.
- Gradually add powdered sugar and stir in crushed Butterfinger pieces.
- Roll into small balls and place on a parchment-lined baking sheet. Freeze for 20-30 minutes.
- Melt chocolate in a microwave or double boiler.
- Dip each ball in melted chocolate, then place back on the baking sheet.
- Let set at room temperature or refrigerate until firm.
Notes
- Use a fork to dip the balls in chocolate for an even coating.
- Store in an airtight container in the fridge for up to a week.
- Sprinkle extra Butterfinger crumbs on top before the chocolate sets for added texture.
- Prep Time: 15 minutes
- Cook Time: 30minutes
Nutrition
- Calories: 120g
- Sugar: 10g
- Sodium: 400mg
- Fat: 2g
- Carbohydrates: 14 g