
HEART-SHAPED BREADSTICKS: Perfect for Any Occasion
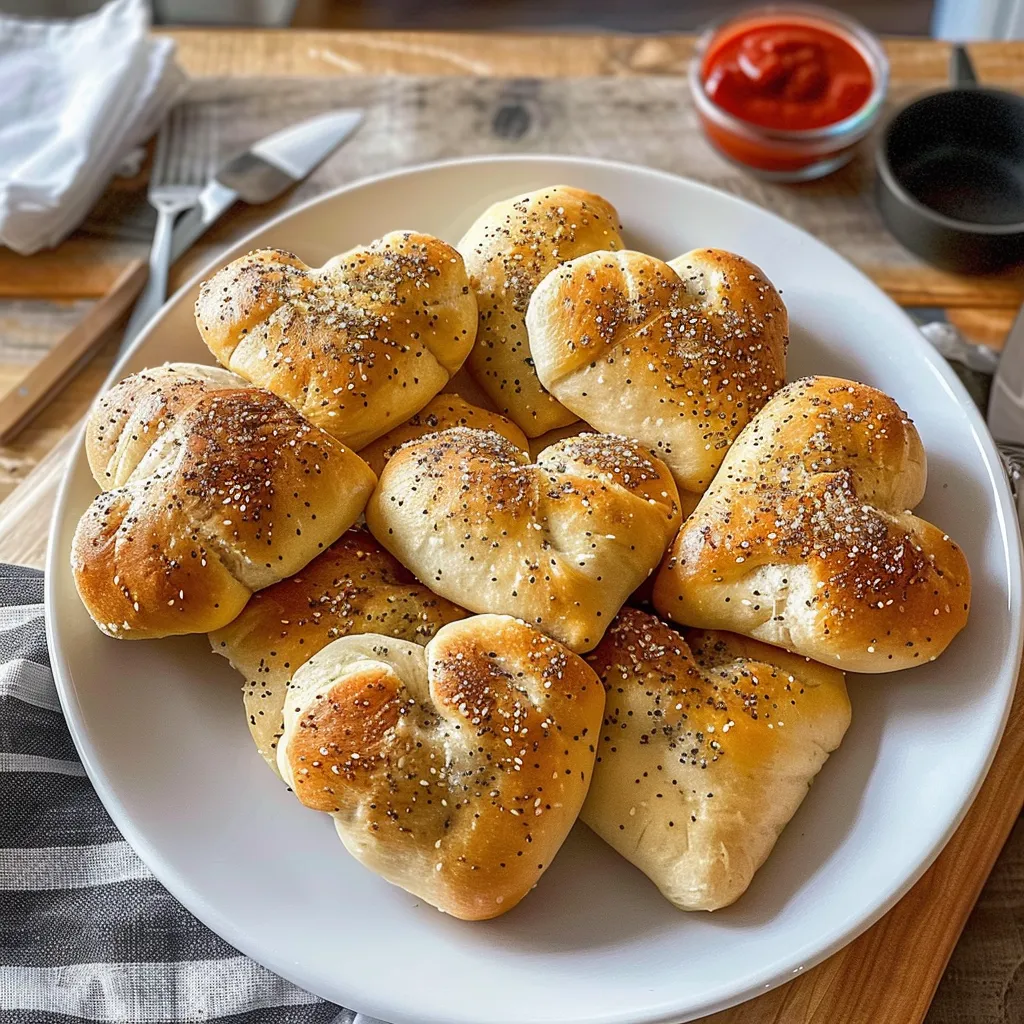
Nothing expresses love quite like food, and what better way to convey your feelings than with delightful HEART-SHAPED BREADSTICKS? These charming treats are perfect for romantic dinners, special celebrations, or simply adding a touch of whimsy to your family meals. Imagine soft, warm breadsticks baked to perfection, their unique shape bringing a smile to everyone’s face.
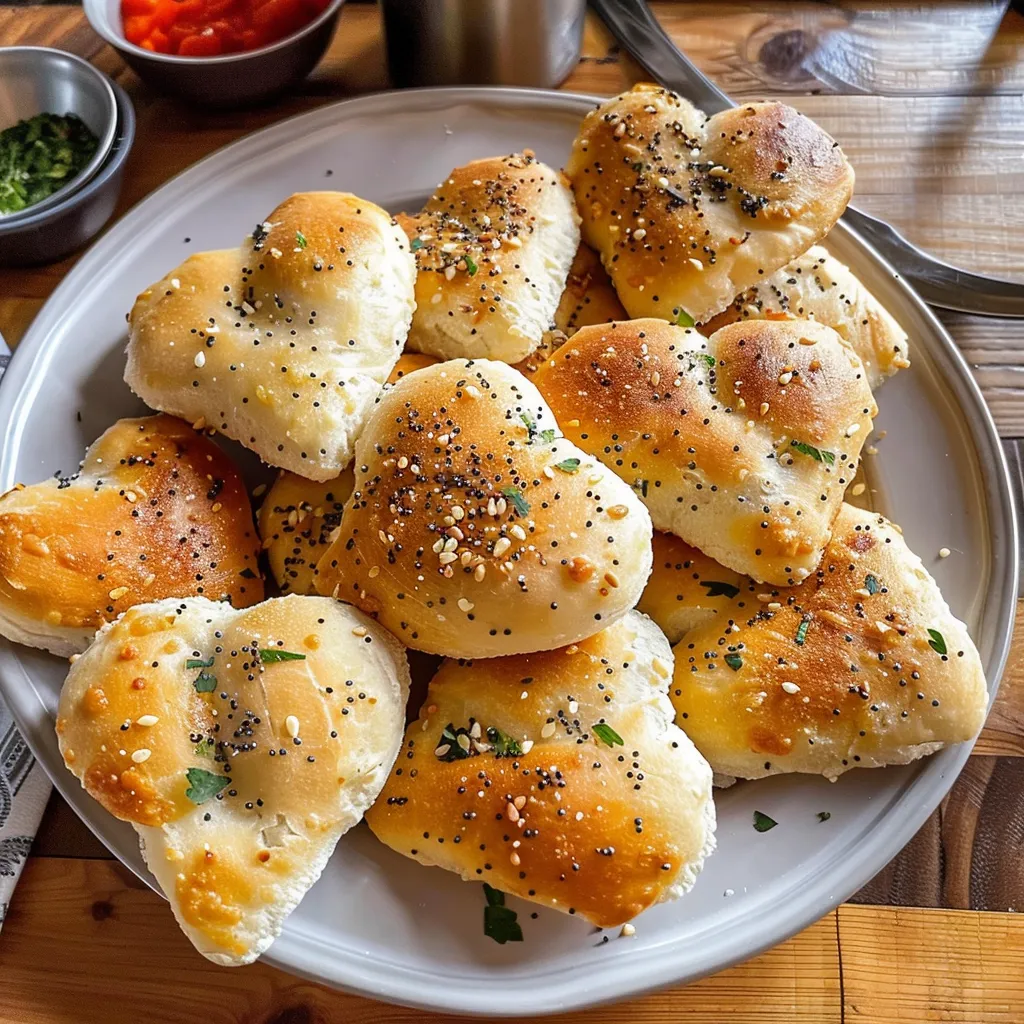
One of the greatest advantages of making these breadsticks is the endless variations you can explore! Consider infusing them with garlic and herbs for a savory touch, or drizzle them with a sweet honey glaze for a delightful twist. No matter the flavor, the heart shape sets these appetizers apart and elevates any dining experience.
For the best results, kneading your dough thoroughly will ensure a delightful texture, while allowing it to rise adequately will create that irresistible fluffiness. Get ready to impress your loved ones with these adorable additions to your table—you won’t be able to resist their charm!
Ingredients for HEART-SHAPED BREADSTICKS:
To make delicious heart-shaped breadsticks that will delight your loved ones, gather the following ingredients. This recipe yields approximately 8 to 10 servings and is perfect for adding a touch of romance to any meal. Here’s what you’ll need:
Basic Ingredients:
- 2 ¼ teaspoons active dry yeast (1 packet)
- 1 tablespoon granulated sugar
- 1 cup warm water (about 110°F or 43°C)
- 3 cups all-purpose flour, plus additional for dusting
- 1 teaspoon salt
- 2 tablespoons olive oil (extra virgin for flavor)
Flavor Enhancements:
To elevate your heart-shaped breadsticks with delightful flavors, consider adding the following optional ingredients:
- 1 tablespoon dried Italian herbs (such as oregano, basil, or thyme)
- 2 cloves garlic, minced, for a fragrant garlic variant
- ½ cup grated Parmesan cheese or mozzarella cheese for a cheesy twist
Toppings:
Add a sprinkle of toppings to enhance the appearance and flavor:
- 1 tablespoon olive oil for brushing
- Coarse sea salt, to taste
- Freshly cracked black pepper, to taste
- 1 tablespoon sesame seeds or poppy seeds for added texture
Serving Suggestions:
These delightful breadsticks can be served plain or alongside delectable dips, such as:
- Marinara sauce for a classic pairing
- Balsamic vinegar mixed with olive oil for a refreshing dip
- Herbed cream cheese spread to indulge your taste buds
Dietary Variations:
For those with special dietary requirements, feel free to adapt this recipe:
- Use gluten-free flour blend instead of all-purpose flour for a gluten-free version
- Substitute coconut oil or vegan butter for a dairy-free option
Gather these ingredients and unleash your creativity to make the perfect heart-shaped breadsticks that will warm hearts and inspire smiles at your table!
How to prepare HEART-SHAPED BREADSTICKS:
Making delicious heart-shaped breadsticks is a delightful task! Follow these steps for a perfect treat.
Gather Your Ingredients
Start by collecting all necessary ingredients. You’ll need warm water, active dry yeast, sugar, flour, salt, and olive oil. Measure each ingredient carefully to ensure the best results.
Activate the Yeast
Pour the warm water into a bowl. Add the sugar and sprinkle the yeast on top. Wait for about 5 minutes until the mixture becomes frothy, which indicates the yeast is active.
Mix the Dough
In a large mixing bowl, combine the flour and salt. Make a well in the center and pour in the yeast mixture along with the olive oil. Stir until the mixture begins to form a dough.
Knead the Dough
Transfer the dough onto a floured surface. Knead it for about 8-10 minutes until it is smooth and elastic. If the dough sticks, sprinkle a little more flour as needed.
Let It Rise
Place the kneaded dough into a lightly oiled bowl. Cover it with a damp cloth or plastic wrap. Allow it to rise in a warm place for about 1 hour, or until it has doubled in size.
Shape the Breadsticks
After the dough has risen, punch it down to release the air. Divide it into 12 equal pieces. Roll each piece into a long rope, about 12 inches in length.
Create Heart Shapes
Take one rope and shape it into a heart. Start by creating a loop at the top, then twist and bend the ends down towards the base to form the heart shape. Place each shaped stick on a baking sheet lined with parchment paper.
Second Rise
Cover the shaped breadsticks with a clean cloth and let them rise for an additional 30 minutes. This allows them to become fluffy and airy.
Bake to Perfection
Preheat your oven to 375°F (190°C). Once the dough has risen, bake the breadsticks in the oven for about 15-20 minutes, or until they turn golden brown.
Cool and Serve
Remove the baking sheet from the oven and let the breadsticks cool slightly. Serve them warm with your favorite dipping sauce or as a side with a meal.
Tips for the Perfect HEART-SHAPED BREADSTICKS
Creating delightful heart-shaped breadsticks is an art that combines the right ingredients with proper technique. Here are some practical tips to ensure yours turn out perfectly every time.
Maintaining the Right Temperature
The temperature of your ingredients can make a significant difference in the texture of your breadsticks. Always use ingredients at room temperature, as this encourages the yeast to activate effectively. If you’re using cold water or milk, warm them gently until they are just lukewarm, about 100°F (37°C). This helps the yeast thrive, leading to a soft and fluffy breadstick.
Choosing Quality Ingredients
When it comes to baking, quality matters. Opt for high-protein bread flour instead of all-purpose flour. This type of flour gives the breadsticks more structure and chew. Fresh yeast or instant yeast will yield better results. Always check the expiration date on your yeast; expired yeast may not rise properly.
Making Dietary Substitutions
If you need to adapt the recipe for dietary restrictions, several options exist. For gluten-free breadsticks, consider using a gluten-free flour blend specifically designed for bread. Add some xanthan gum to help mimic the elasticity of wheat based dough. If you want a dairy-free version, substitute any milk with almond or oat milk and use olive oil instead of butter for brushing on top.
Add Flavor with Seasonings
To elevate your breadsticks, use your favorite herbs and spices. Garlic powder, dried basil, or oregano make excellent additions right into the dough. You can brush the finished breadsticks with garlic-infused olive oil or sprinkle some sea salt on top for an extra flavor punch. Experiment with different seasonings to find what you love best!
Perfecting the Shape and Bake
For an adorable shape, roll the dough into ropes, then twist them to form hearts. Make sure not to twist too tightly; the breadsticks need room to expand while baking. Preheat your oven adequately—around 375°F (190°C) is ideal for a crisp exterior and soft interior. Bake until golden brown, approximately 12-15 minutes. Let them cool slightly before serving for the best texture.
Remember, practice makes perfect. With time, you’ll discover your own tips and tricks that work best for your baking style. Enjoy your delicious creations!
Storage Tips for HEART-SHAPED BREADSTICKS:
When it comes to savoring your homemade heart-shaped breadsticks, proper storage is key to maintaining their freshness and delightful texture. Follow these tips to keep your breadsticks tasty and enjoyable for days.
Maintaining Freshness
To maintain the freshness of your breadsticks, store them in an airtight container. Choose a container that fits the quantity to prevent air from taking up space. If you do not have an airtight container, wrap the breadsticks tightly in plastic wrap or aluminum foil. This helps seal in moisture and keep them soft.
Optimal Storage Conditions
For the best results, keep your breadsticks at room temperature in a cool, dry place. Avoid areas with direct sunlight or heat sources, as these can cause breadsticks to become stale faster. A pantry or cupboard works well for this purpose. If you live in a humid environment, consider adding a food-safe desiccant packet to absorb any excess moisture.
Refrigerating and Freezing
While it’s best to store breadsticks at room temperature, you can refrigerate them if you need to extend their shelf life. Wrap them tightly and place in the refrigerator. However, note that refrigeration can change the texture slightly, making them a bit denser. To restore some of their original texture, reheat the breadsticks in a warm oven before serving.
If you want to keep your heart-shaped breadsticks for an extended time, freezing is an excellent option. First, cool the breadsticks completely at room temperature. Then, wrap each stick in plastic wrap and place them in a freezer-safe bag. This method helps prevent freezer burn and retains flavor. You can store frozen breadsticks for up to three months.
Thawing and Reheating
To enjoy your frozen breadsticks, pull them out of the freezer and let them thaw in the refrigerator overnight. If you’re short on time, you can also microwave them on a low setting for a few seconds until thawed. To reheat, place them in a preheated oven at 350°F (175°C) for about 5 to 10 minutes, or until they are heated through. This step revives their crispy exterior.
Following these simple storage tips ensures you get the most out of your delicious heart-shaped creations. Happy munching!
Related Recipes That Complement Heart-Shaped Breadsticks
If you love heart-shaped breadsticks, you might also enjoy these related recipes. Each one offers a delightful pairing for your breadsticks, creating a charming meal experience.
Garlic Butter Dipping Sauce
This rich and savory dipping sauce enhances the flavor of your breadsticks. Made with fresh garlic, butter, and a sprinkle of herbs, it provides a creamy texture that perfectly balances the crispness of the breadsticks. The combination creates a satisfying taste sensation that brings you back for more.
Caprese Salad Skewers
Bright and fresh, these skewers combine cherry tomatoes, basil leaves, and mozzarella balls. Their vibrant colors and refreshing flavors beautifully contrast the warm, buttery breadsticks. The acidity of the tomatoes complements the richness of the bread, making them an ideal side dish.
Spinach and Artichoke Dip
This creamy and cheesy dip pairs excellently with your breadsticks. The warm, gooey texture and bold flavors add a savory note, creating a delightful contrast. Dipping the breadsticks into this dip creates a comforting and irresistible snack for any occasion.
Stuffed Mushrooms
These savory bites offer a hearty addition to your spread. Filled with a mix of cheeses, breadcrumbs, and herbs, they’re rich and delicious. Each stuffed mushroom complements the lightness of the breadsticks while providing a satisfying and flavorful option for your guests.
These recipes not only pair well but create a cohesive dining experience. They enhance flavors and textures, making your meal memorable.
Frequently Asked Questions:
What are heart-shaped breadsticks best suited for?
Heart-shaped breadsticks are perfect for a variety of occasions, particularly romantic dinners, anniversaries, or Valentine’s Day celebrations. Their playful shape adds a whimsical touch to the table, making them an excellent accompaniment to soups, salads, or as part of a charming appetizer platter.
Can I make heart-shaped breadsticks in advance?
Yes, you can prepare these delightful breadsticks ahead of time. After shaping the dough into hearts, you can freeze them before baking. When you’re ready to enjoy them, simply bake from frozen, adjusting the baking time slightly to ensure they cook through nicely.
What type of dough is used for heart-shaped breadsticks?
Traditionally, a simple breadstick dough is made using basic ingredients like flour, water, yeast, and salt. Some variations might incorporate herbs, cheese, or spices to add flavor. You can experiment with different types of dough, such as whole wheat or gluten-free, to suit your dietary preferences.
How do I achieve a golden-brown finish on my heart-shaped breadsticks?
To achieve a perfect golden-brown crust, brush the heart-shaped breadsticks with an egg wash (a beaten egg mixed with a splash of water) or olive oil before baking. This not only enhances the color but also adds a lovely sheen to your baked goods.
Can I customize the flavors of my heart-shaped breadsticks?
Absolutely! You can personalize the flavor of your breadsticks by incorporating various seasonings or ingredients. Think garlic powder, Italian herbs, or even a sprinkle of cheese. The versatility of the dough allows for countless combinations to match your taste preferences.
Are heart-shaped breadsticks suitable for gluten-free diets?
Yes, you can make gluten-free breadsticks using a gluten-free flour blend. Simply substitute the regular flour with a gluten-free alternative, and follow the same preparation steps. Ensure that any additional ingredients you use, such as cheese or spices, are also gluten-free.
Conclusion:
In summary, creating heart-shaped breadsticks is a delightful and uncomplicated culinary adventure that brings a touch of love to any meal. This recipe emphasizes flexibility—feel free to adapt flavors to suit your taste, whether you prefer classic garlic, zesty herbs, or inventive spices. The customization options are boundless, allowing for variations like cheese-stuffed or sweetened versions perfect for desserts. Importantly, the uncomplicated steps make this dish approachable for cooks of all skill levels. Not only do these breadsticks serve as an attractive accompaniment to dinner, but they also make memorable gifts for loved ones on special occasions. With just a few essential ingredients and a little creativity, you can effortlessly impress friends and family with your homemade heart-shaped breadsticks. Enjoy the process, and let your heart shine through in every twist and turn!
Print
HEART-SHAPED BREADSTICKS: Perfect for Any Occasion
- Total Time: 21 minute
- Yield: 12 breadsticks 1x
Description
These Heart-Shaped Breadsticks are soft, buttery, and fun to make! Perfect for Valentine’s Day, anniversaries, or any special occasion, they add a touch of love to any meal. Whether served with soup, salad, or marinara sauce, they’re sure to impress!
Ingredients
- 1 can (13.8 oz) refrigerated pizza dough (or homemade dough)
- 2 tbsp butter, melted
- ½ tsp garlic powder
- ½ tsp Italian seasoning
- ¼ cup Parmesan cheese, grated (optional)
- 1 tbsp flour (for dusting)
- Marinara sauce (for dipping, optional)
Instructions
1️⃣ Preheat & Prepare
- Preheat your oven to 375°F (190°C).
- Line a baking sheet with parchment paper and lightly dust with flour.
2️⃣ Shape the Dough
- Roll out the pizza dough into a rectangle, about ¼-inch thick.
- Cut into 12 strips, each about ½ inch wide.
- Take each strip and fold it into a heart shape, pressing the ends together to hold.
3️⃣ Brush with Butter & Season
- In a small bowl, mix the melted butter, garlic powder, and Italian seasoning.
- Brush the mixture over the shaped breadsticks.
- Sprinkle with Parmesan cheese if using.
4️⃣ Bake to Perfection
- Bake for 12-15 minutes, or until golden brown.
5️⃣ Serve & Enjoy
- Let cool slightly before serving.
- Serve with warm marinara sauce for dipping
Notes
✔️ For extra crunch, sprinkle a little sea salt on top before baking.
✔️ Want a cheesy twist? Add mozzarella cheese inside each strip before shaping into hearts.
✔️ Use homemade dough for a more personalized touch!
- Prep Time: 12 breadsticks
- Cook Time: 15 minutes
Nutrition
- Calories: 110 kcal
- Carbohydrates: 14g
- Protein: 3g