
Mini No-Bake Oreo Cheesecakes
Mini No-Bake Oreo Cheesecakes: The Perfect Indulgence in Every Bite
Introduction to Mini No-Bake Oreo Cheesecakes
Looking for the perfect dessert that’s easy to make, indulgent, and guaranteed to impress your guests? Mini No-Bake Oreo Cheesecakes are just the treat you need. These little cheesecakes combine the rich and creamy texture of cheesecake with the deliciously familiar taste of Oreo cookies, creating a perfect bite-sized dessert that everyone will love.
What makes these cheesecakes so irresistible is their no-bake nature. Unlike traditional cheesecakes, which require hours of baking and cooling time, these mini cheesecakes come together in just a few simple steps with minimal effort. They are chilled in the fridge to set, leaving you with a smooth and creamy filling on top of a crunchy Oreo crust. The best part? These cheesecakes are customizable, so you can tweak the ingredients to suit your taste preferences.
Whether you’re hosting a party, celebrating a special occasion, or simply looking to indulge your sweet tooth, these mini Oreo cheesecakes are an excellent choice. They’re fun to make, easy to serve, and taste absolutely delicious.
Benefits and Advantages of Mini No-Bake Oreo Cheesecakes
1. Simple and Quick to Prepare
One of the main advantages of Mini No-Bake Oreo Cheesecakes is their simplicity. You don’t need to worry about turning on the oven or spending hours in the kitchen. The process is straightforward and quick, and the best part is that you don’t have to bake the cheesecakes at all. With just a few ingredients and some chilling time, you’ll have a decadent dessert ready to enjoy.
2. Perfect for Portion Control
If you’re hosting a party or a gathering, mini cheesecakes are a fantastic option because they provide individual servings. No need for slicing or messy servings—each guest gets their own perfectly portioned cheesecake. Plus, the mini size makes them easy to enjoy without feeling too guilty.
3. Customizable to Your Preferences
One of the best things about Mini No-Bake Oreo Cheesecakes is that they are highly customizable. You can adjust the sweetness level, change the type of cookies, or add different toppings to make the cheesecakes truly your own. For example, you could add a swirl of peanut butter or chocolate sauce, top with fresh fruit, or experiment with different types of cookies for the crust.
4. No Baking Required
If you’re not a fan of baking or just want a hassle-free dessert, these cheesecakes are the answer. With no baking involved, they are perfect for hot weather or when you want a dessert without the added heat of the oven. Simply mix, chill, and serve!
5. Ideal for Special Occasions or Everyday Treats
Whether you’re hosting a holiday dinner, birthday party, or family get-together, these mini cheesecakes make a great addition to any event. They’re also perfect for a sweet treat to enjoy at home, offering a little indulgence without too much effort. The versatility of this dessert makes it suitable for all occasions.
Ingredients Overview
Essential Ingredients for Mini No-Bake Oreo Cheesecakes
For the Oreo Crust:
- Oreos (18 cookies): The classic chocolate sandwich cookie, crushed to create the crunchy crust. You can use regular Oreos or any flavor variation you prefer.
- Butter (5 tablespoons, melted): The butter binds the Oreo crumbs together to form a firm crust.
For the Cheesecake Filling:
- Cream cheese (8 oz, softened): The creamy base of the cheesecake filling. It provides the smooth and rich texture.
- Granulated sugar (⅓ cup): Adds sweetness to the filling.
- Vanilla extract (1 teaspoon): Enhances the flavor of the cheesecake filling.
- Heavy cream (1 cup): Whipped to stiff peaks, it adds a light and airy texture to the cheesecake.
- Oreo cookies (6 cookies, chopped): Chopped cookies add extra crunch and Oreo flavor to the filling.
For Topping:
- Mini Oreos (for garnish): Mini Oreos are perfect for topping each cheesecake for an extra bit of Oreo goodness.
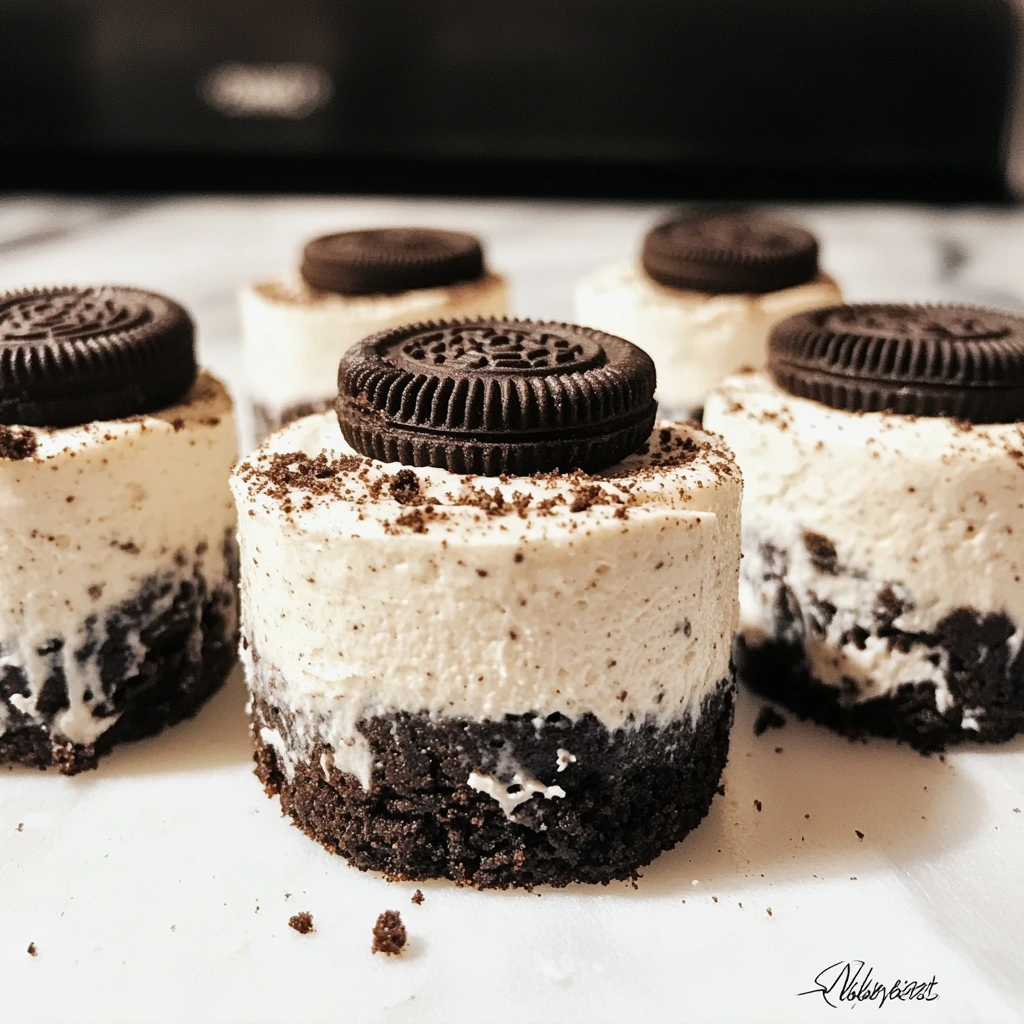
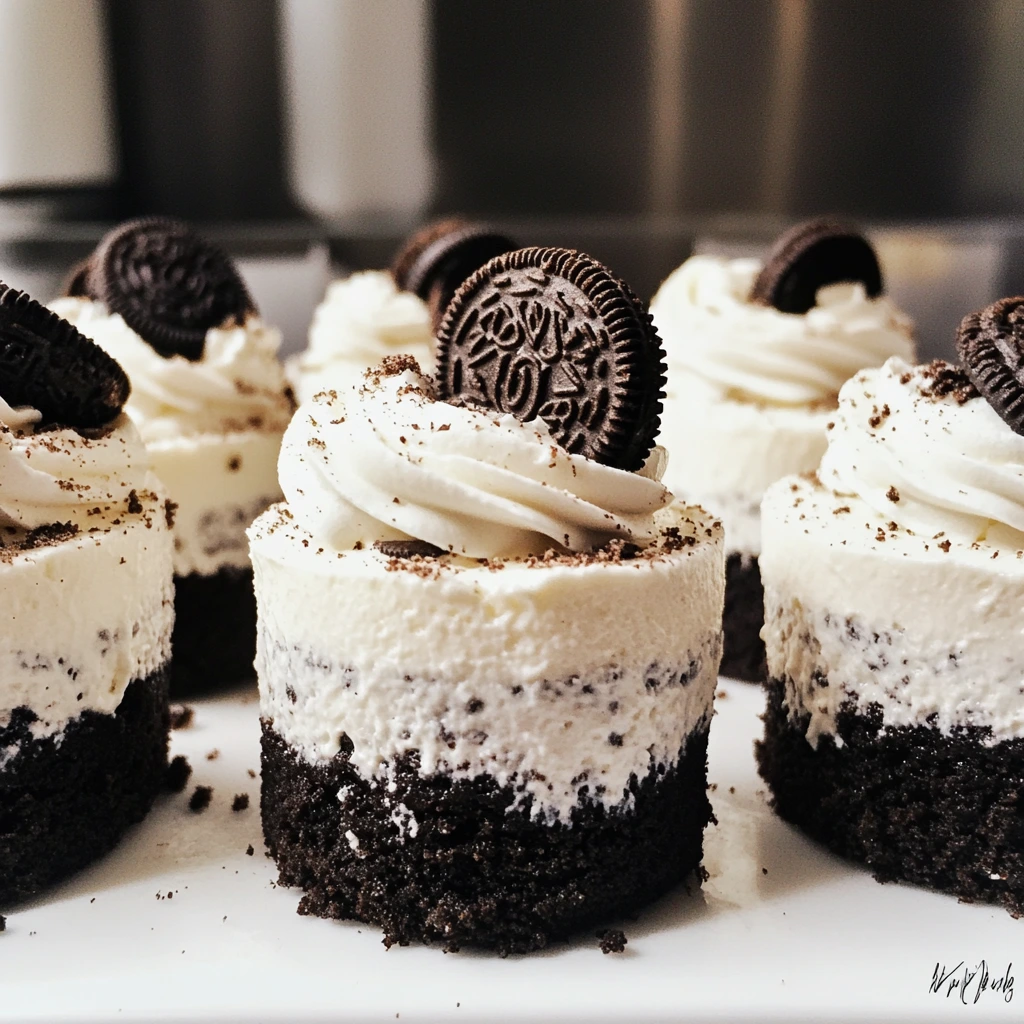
How to Prepare Mini No-Bake Oreo Cheesecakes: Step-by-Step Guide
Step 1: Prepare the Oreo Crust
- Crush the Oreos: Place 18 regular Oreos in a food processor and pulse until they form fine crumbs. If you don’t have a food processor, you can place the cookies in a ziplock bag and crush them with a rolling pin until they are finely ground.
- Mix with melted butter: In a bowl, combine the crushed Oreos with the melted butter and stir until the crumbs are fully coated.
- Press into muffin tin: Line a 12-cup muffin tin with paper liners. Spoon about 1 tablespoon of the Oreo mixture into the bottom of each muffin cup, then use the back of a spoon to press it down firmly, creating an even crust. Place the muffin tin in the refrigerator for at least 15 minutes to set the crust.
Step 2: Prepare the Cheesecake Filling
- Beat the cream cheese: In a large mixing bowl, beat the softened cream cheese with an electric mixer until smooth and creamy. This will help remove any lumps and create a smooth filling.
- Add the sugar and vanilla: Mix in the granulated sugar and vanilla extract, then continue to beat until the mixture is smooth and fluffy.
- Whip the heavy cream: In a separate bowl, whip the heavy cream until stiff peaks form. This will give the filling a light and airy texture.
- Fold in the whipped cream: Gently fold the whipped heavy cream into the cream cheese mixture using a spatula. Be careful not to deflate the whipped cream. The mixture should be light and fluffy.
- Add chopped Oreos: Chop 6 Oreos into small pieces and gently fold them into the cheesecake filling to add extra flavor and texture.
Step 3: Assemble the Cheesecakes
- Fill the crusts: Spoon the cheesecake filling over the chilled Oreo crusts, dividing it evenly among the muffin cups. Use the back of a spoon to smooth the tops and ensure they are level.
- Chill to set: Place the muffin tin back in the refrigerator and allow the cheesecakes to chill for at least 4 hours, or overnight, for best results. This will give the filling time to firm up.
Step 4: Garnish and Serve
- Top with mini Oreos: Before serving, garnish each cheesecake with a mini Oreo cookie on top. This adds a cute finishing touch and extra Oreo flavor.
- Serve and enjoy: Remove the cheesecakes from the muffin tin and place them on a serving platter. Enjoy these indulgent treats with family and friends!
Advanced Tips and Variations for Mini No-Bake Oreo Cheesecakes
1. Add a Chocolate Drizzle
For an extra indulgent touch, drizzle some melted chocolate (dark, milk, or white) over the top of the cheesecakes before serving. This adds a rich chocolatey contrast to the creamy cheesecake and enhances the Oreo flavor.
2. Make It Gluten-Free
If you need to make these cheesecakes gluten-free, simply swap out the regular Oreos for gluten-free Oreos, which are widely available in stores. Make sure the butter and other ingredients are gluten-free as well.
3. Make Mini Oreo Cheesecake Jars
Instead of using a muffin tin, you can assemble these cheesecakes in small mason jars for a cute, portable version. Layer the Oreo crust, cheesecake filling, and chopped Oreos in jars for a fun presentation.
4. Experiment with Flavors
While the classic Oreo flavor is always a hit, feel free to experiment with different flavor combinations. Try adding a layer of raspberry or strawberry sauce, or folding in crushed peanut butter cups or chopped candy bars for a fun twist.
How to Store Mini No-Bake Oreo Cheesecakes: Best Practices
Refrigeration
These Mini No-Bake Oreo Cheesecakes should be stored in an airtight container in the refrigerator. They will stay fresh for up to 3 days. Be sure to keep them chilled until you’re ready to serve.
Freezing
If you have leftovers or want to make them ahead of time, these cheesecakes freeze well. Place the cheesecakes in an airtight container and freeze for up to 1 month. When ready to serve, let them thaw in the refrigerator for a few hours before enjoying.
Nutritional Value of Mini No-Bake Oreo Cheesecakes
Here’s a general breakdown of the nutritional content for Mini No-Bake Oreo Cheesecakes per serving (1 mini cheesecake):
- Calories: 250-300
- Fat: 18g
- Carbohydrates: 26g
- Protein: 3g
- Fiber: 1g
- Sodium: 180mg
- Cholesterol: 40mg
These mini cheesecakes are a rich and indulgent treat, so they should be enjoyed in moderation. They offer a perfect balance of creamy, sweet, and crunchy in every bite.
FAQs: Frequently Asked Questions about Mini No-Bake Oreo Cheesecakes
1. Can I use a different type of cookie for the crust?
Yes, you can swap out the Oreos for another type of cookie, such as chocolate wafer cookies
, graham crackers, or even gluten-free cookies for those with dietary restrictions.
2. Can I make these cheesecakes ahead of time?
Yes! In fact, making them ahead of time is highly recommended. They need time to chill and set, so preparing them a day in advance works perfectly. Just store them in the refrigerator until you’re ready to serve.
3. Can I use a different topping?
Absolutely! You can use any toppings you like, such as whipped cream, fresh berries, chocolate shavings, or crushed nuts. Get creative with the presentation and make it your own!
Conclusion
Mini No-Bake Oreo Cheesecakes are the perfect dessert for any occasion. They are quick and easy to prepare, requiring no baking, and they can be customized to suit your tastes. Whether you’re serving them at a party, a family dinner, or as a treat for yourself, these mini cheesecakes are sure to be a crowd-pleaser. With their creamy filling, crunchy Oreo crust, and the option to add your own personal touch, these cheesecakes are guaranteed to impress.