
No Bake Oreo Cheesecake: Easy, Delicious & No Oven Needed!
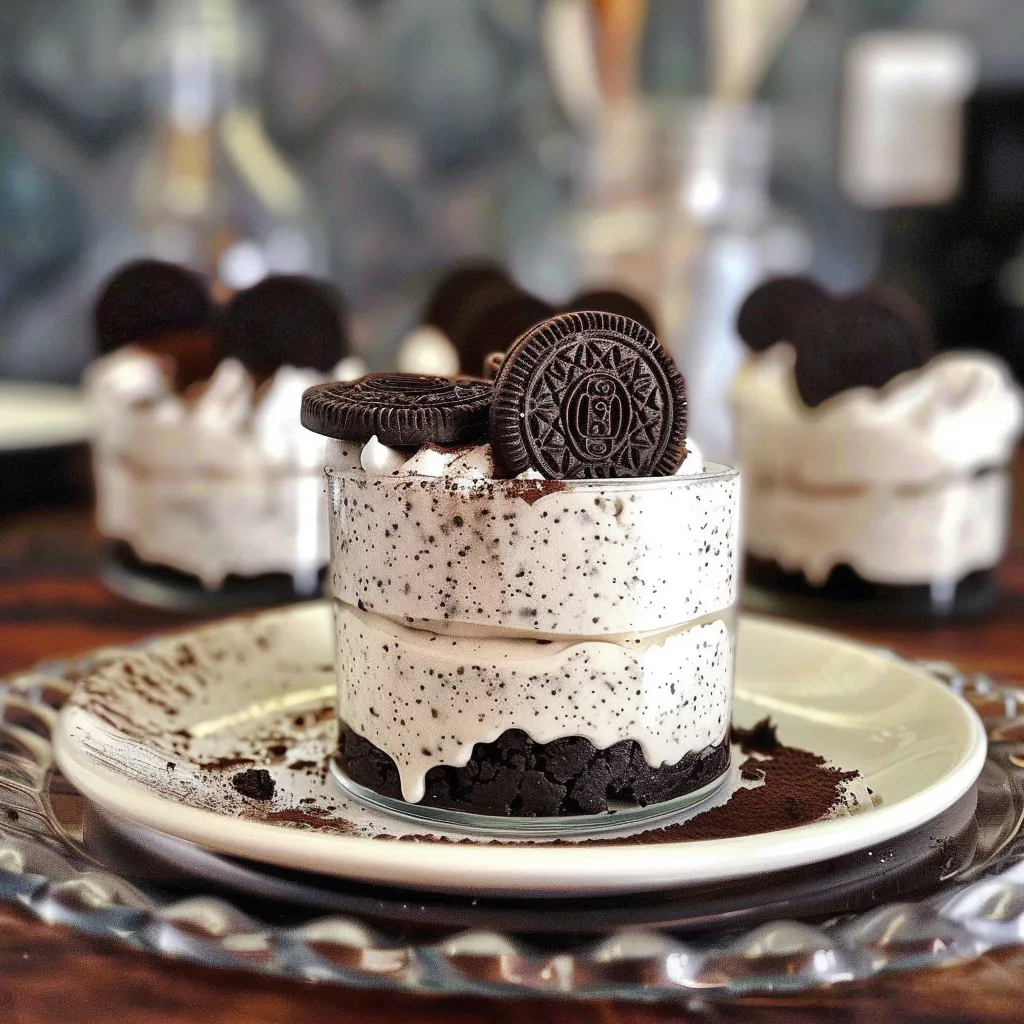
Who can resist the rich, creamy delight of a cheesecake, especially when it comes to the beloved No Bake Oreo Cheesecake? This dessert captures the essence of indulgence without the hassle of baking, making it a perfect option for both novice and experienced cooks. Picture luscious layers of cream cheese mingling with crushed Oreos, all perched atop a buttery crust. Not only does this treat offer a decadent taste, but it also allows for creativity in the kitchen.
Feel free to elevate the classic recipe by incorporating flavors like mint or peanut butter, or even adding fresh fruit for an unexpected twist. Achieving the best results is simple—be sure to let your cheesecake chill for adequate time to establish that perfect sliceable texture, and don’t be shy with the toppings! With a little finesse, your No Bake Oreo Cheesecake can transform from a simple dessert into a show-stopping centerpiece, guaranteed to impress family and friends alike.
Ingredients for No Bake Oreo Cheesecake:
Creating a decadent No Bake Oreo Cheesecake requires a careful selection of ingredients to achieve that perfect creamy texture and delightful flavor. Below is a comprehensive list of what you will need to prepare this delicious dessert that serves 8–10 people.
Crust Ingredients:
- 24 Oreo cookies, crushed into fine crumbs
- 5 tablespoons unsalted butter, melted
- 2 tablespoons granulated sugar
Cheesecake Filling Ingredients:
- 16 oz cream cheese, softened to room temperature
- 1 cup powdered sugar
- 1 teaspoon vanilla extract
- 1 cup heavy whipping cream
- 8-10 extra Oreo cookies, chopped (for mixing into the filling)
Topping Components:
- 4 oz whipped cream (store-bought or homemade, for garnish)
- 4 Oreo cookies, halved or crushed, for decoration
Variations and Alternatives:
If you’re looking to switch things up, consider these variations for your cheesecake:
- Mint Oreo Cheesecake: Substitute regular Oreos with Mint Oreos for a refreshing twist on this classic dessert.
- Peanut Butter Oreo Cheesecake: Incorporate ½ cup of creamy peanut butter into the cheesecake filling for a nutty flavor that pairs beautifully with Oreo.
- Chocolate Drizzle: Drizzle melted chocolate over the top before adding the whipped cream for an extra decadent touch.
- Fruit Topping: Pair with fresh or frozen berries for a fruity contrast that complements the rich flavors.
Be sure to scope out your local store for high-quality ingredients, as the better the ingredients, the more delicious your cheesecake will be. Enjoy making your No Bake Oreo Cheesecake with these carefully chosen essentials!

How to prepare No Bake Oreo Cheesecake:
Making a No Bake Oreo Cheesecake is straightforward and requires minimal time and effort. Follow these steps to create a creamy and delicious dessert perfect for any occasion.
Step 1: Gather Your Ingredients
Start by collecting all necessary ingredients. You will need:
- 24 Oreo cookies
- 5 tablespoons unsalted butter
- 16 ounces cream cheese, softened
- 1 cup powdered sugar
- 1 teaspoon vanilla extract
- 1 cup heavy whipping cream
- Extra Oreo cookies for decoration
Step 2: Prepare the Oreo Crust
Use a food processor to crush 24 Oreo cookies until they resemble fine crumbs.
In a small saucepan, melt 5 tablespoons of unsalted butter over low heat.
Combine the melted butter with the crushed Oreo crumbs in a mixing bowl.
Mix them thoroughly until the mixture resembles wet sand.
Press the mixture evenly into the bottom of a 9-inch springform pan. Ensure it’s packed tightly.
Step 3: Make the Cheesecake Filling
In a large mixing bowl, beat 16 ounces of softened cream cheese using an electric mixer until smooth.
Gradually add 1 cup of powdered sugar and 1 teaspoon of vanilla extract to the cream cheese, mixing until well combined.
Step 4: Whip the Cream
In another bowl, pour 1 cup of heavy whipping cream.
Beat the heavy cream on high speed until stiff peaks form, which takes about 3-5 minutes.
Step 5: Combine Mixtures
Gently fold the whipped cream into the cream cheese mixture until fully incorporated.
Be careful not to deflate the whipped cream. The filling should be light and fluffy.
Step 6: Assemble the Cheesecake
Pour the cheesecake filling over the prepared Oreo crust in the springform pan.
Smooth the top with a spatula for an even finish.
Step 7: Chill the Cheesecake
Cover the springform pan with plastic wrap and refrigerate for at least 4 hours or overnight.
Step 8: Decorate and Serve
Before serving, crush a few extra Oreo cookies to sprinkle on top of the cheesecake. This adds a nice visual and flavor contrast.
Once set, slice and enjoy your delightful no-bake treat!
Tips for the Perfect No Bake Oreo Cheesecake
Creating a delicious no bake cheesecake can be straightforward, but a few tips can elevate your dessert to perfection. Here are essential points to consider when preparing your dessert.
Maintaining the Right Temperature
Temperature plays a critical role in achieving the right texture. Start with room-temperature cream cheese. This makes it easier to blend smoothly, preventing lumps in your cheesecake. Also, chill your mixing bowl and beaters in the fridge before whipping cream. This ensures the cream whips faster and holds its shape better when mixed into the filling.
Choosing Quality Ingredients
The taste of your cheesecake relies heavily on the quality of ingredients. Use real cream cheese for a rich flavor, not the spreadable kind. Select high-quality whipping cream as well. Fresh, organic ingredients enhance the overall taste and texture of your final product. When possible, opt for brand-name Oreos, as these cookies deliver the best flavor and crunch.
Substitutions for Dietary Restrictions
If you need to cater to dietary restrictions, several substitutions work well. For a gluten-free version, swap regular Oreos for gluten-free cookies. Dairy-free alternatives include coconut cream or cashew cream instead of traditional cream cheese, and almond or coconut based whipping creams instead of dairy cream. These adjustments can help your cheesecake cater to various dietary needs without sacrificing too much flavor.
Tips for the Cheesecake Filling
To ensure a smooth filling, use a hand mixer or stand mixer to beat the cream cheese until fluffy. Gradually mix in powdered sugar to avoid a gritty texture. Fold in the whipped cream gently, allowing air to retain in the mixture, which creates lightness. You can add chopped Oreos for texture at this stage, enhancing the overall crunch.
Setting Your Cheesecake
Once assembled, ensure that the cheesecake chills for at least four hours, or overnight for best results. This allows the filling to firm up properly. For a beautiful presentation, serve chilled and consider adding fresh fruit or additional crumbled cookies on top right before serving.
By following these tips, you’ll set yourself up for success in crafting a no bake masterpiece that everyone will love.
Storage Tips for No Bake Oreo Cheesecake:
To keep your no bake Oreo cheesecake fresh and delicious, you must store it properly. Follow these storage tips to ensure it maintains its creamy texture and rich flavor.
Optimal Storage Conditions
Begin by storing your cheesecake in the refrigerator. Wrap it tightly with plastic wrap or aluminum foil. This prevents air from getting in and helps avoid any absorption of unwanted odors from other foods. If you have a cake dome or airtight container, consider using that for added protection.
Maintaining Freshness
For best results, consume the cheesecake within 3-5 days of making it. The longer it stays in the fridge, the more the texture may change. If you notice any signs of spoilage, such as an off smell or discoloration, do not take any chances. It’s best to discard it.
Freezing No Bake Oreo Cheesecake
If you want to extend the shelf life, you can freeze the cheesecake. Slice it into individual servings for easy access. Wrap each slice in plastic wrap, then place them in a freezer-safe container. This helps preserve its taste and texture. Your cheesecake can last in the freezer for up to 2-3 months.
When you are ready to enjoy a slice, transfer it to the refrigerator to thaw overnight. Avoid using the microwave for defrosting, as it can alter the texture. If you have a whole cheesecake, allow it to thaw in the refrigerator for 6-8 hours before serving.
Avoiding Freezer Burn
To prevent freezer burn, ensure the cheesecake is tightly wrapped. Use heavy-duty plastic wrap for extra protection. You can also double-wrap it with foil for an additional layer of defense against moisture. This method ensures your cheesecake remains as delightful as the day you made it.
Final Thoughts
Remember, proper storage plays a crucial role in maintaining the quality of your no bake Oreo cheesecake. By following these tips, you can enjoy this delightful dessert even days after you’ve made it. Cherish every slice by storing it correctly!
Related Recipes to No Bake Oreo Cheesecake
If you love the creamy texture and rich flavor of a no bake cheesecake, you might also enjoy these similar desserts. Each recipe brings its own twist while maintaining a simple, no-bake approach.
First, consider a No Bake Chocolate Cheesecake. This dessert highlights chocolate instead of cookies. The velvety chocolate filling pairs perfectly with a graham cracker crust, just like the original. It’s a great option if you want a chocolatey indulgence without extra baking time.
Next, try a No Bake Strawberry Cheesecake. This version uses fresh strawberries to create a fruity flavor. The vibrant fruit compensates for the richness of cream cheese, offering a refreshing balance similar to the creamy delight of the Oreo variant. Its lightness makes it perfect for summer gatherings.
Another fantastic option is a No Bake Peanut Butter Pie. It features a creamy peanut butter filling that mirrors the texture of the original recipe. The chocolate crust complements the peanut butter, making it a delightful treat for chocolate and peanut butter lovers alike.
Lastly, don’t overlook No Bake Lemon Cream Pie. The tangy lemon curd filling provides a zesty counterpoint to the sweetness found in most cheesecake recipes. This dessert’s refreshing quality makes it ideal for those who prefer a lighter, fruitier flavor.
These recipes share the simplicity and deliciousness that you’d expect from a cheesecake. They also offer variety, making them perfect pairings for different occasions and palates. Enjoy exploring these delightful desserts!
Frequently Asked Questions:
What is a no bake Oreo cheesecake?
A no bake Oreo cheesecake is a decadent dessert that combines creamy cheesecake filling with crushed Oreo cookies, all without the need for baking. This dessert typically features a crust made from Oreo cookie crumbs and a rich filling made with cream cheese, whipped cream, and crushed Oreos, making it an easy yet indulgent treat.
How long does it take to prepare a no bake Oreo cheesecake?
While the preparation of a no bake Oreo cheesecake is relatively quick, allowing about 20 to 30 minutes to mix the ingredients is necessary. However, you should plan for additional chilling time in the refrigerator, usually around 4 to 6 hours or overnight, to allow the cheesecake to set properly before serving.
Can I substitute regular Oreos with gluten-free Oreos?
Absolutely! If you need a gluten-free version of this dessert, you can easily substitute regular Oreos with gluten-free Oreo cookies. This makes it an accessible and enjoyable treat for those with gluten sensitivities without compromising on flavor or texture.
What can I serve with no bake Oreo cheesecake?
Serving options are plentiful for this delightful dessert. You can enhance each slice with a drizzle of chocolate sauce, a dollop of whipped cream, or fresh berries such as strawberries or raspberries for a refreshing contrast. Each accompaniment adds a new dimension to the flavor.
How do I store leftover no bake cheesecake?
To store leftover cheesecake made without baking, cover it tightly with plastic wrap or place it in an airtight container. It can be kept in the refrigerator for up to 5 days. For longer storage, you may also freeze individual slices, ensuring that you wrap them well to prevent freezer burn.
Can I add other flavors to my no bake cheesecake?
Certainly! One of the great aspects of no bake cheesecakes is their versatility. You can twist traditional recipes by incorporating other flavors like peanut butter, mint, or even fruit puree. Just ensure that any additional ingredients do not compromise the overall consistency of the filling.
Conclusion:
In summary, the No Bake Oreo Cheesecake is a dessert that combines ease and indulgence, making it a perfect choice for both novice and experienced bakers. This recipe highlights its incredible simplicity, as it requires minimal preparation and no baking time, allowing you to whip it up in no time. Flexibility is another standout feature; feel free to incorporate your favorite flavors, whether that’s adding cream cheese variations or mixing in different cookies. Additionally, customization options are endless—consider layering in fruit, drizzling chocolate or caramel, or even experimenting with toppings to elevate the cheesecake experience. With these key points in mind, you can confidently create a delightful, personalized dessert that will impress your friends and family. Don’t forget, the joy of this No Bake Oreo Cheesecake lies in its adaptability to satisfy every palate!
Print
No Bake Oreo Cheesecake: Easy, Delicious & No Oven Needed!
- Total Time: 4 hours 15 minutes
- Yield: 12 servings 1x
Description
This No Bake Oreo Cheesecake is the perfect dessert when you want something rich, creamy, and indulgent without turning on the oven! A crunchy Oreo crust paired with a velvety cheesecake filling makes this dessert irresistible. Easy to make and even easier to enjoy!
Ingredients
-
24 Oreo cookies, crushed (for the crust)
-
1/4 cup unsalted butter, melted
-
2 cups cream cheese, softened
-
1 cup heavy whipping cream
-
1/2 cup powdered sugar
-
1 tsp vanilla extract
-
1/2 cup mini Oreo cookies (for the filling)
-
1/4 cup chocolate syrup (optional, for drizzle)
Instructions
-
Make the crust: In a bowl, mix crushed Oreos and melted butter until well combined. Press the mixture into the bottom of a 9-inch springform pan or pie dish. Refrigerate for 10-15 minutes to set.
-
Prepare the filling: In a mixing bowl, beat cream cheese with powdered sugar and vanilla extract until smooth and creamy.
-
Whip the cream: In a separate bowl, whip heavy cream until stiff peaks form, then gently fold it into the cream cheese mixture.
-
Add mini Oreos: Stir in mini Oreo cookies for added crunch and flavor.
-
Assemble: Spoon the filling over the chilled Oreo crust and smooth the top with a spatula.
-
Chill: Refrigerate for at least 4 hours (or overnight) until firm.
-
Serve: Top with chocolate syrup or extra crushed Oreos for decoration before serving.
Notes
-
For an extra decadent touch, add a layer of chocolate ganache on top before chilling.
-
If you prefer a sweeter filling, you can adjust the powdered sugar to taste.
-
Can be stored in the fridge for up to 3 days.
- Prep Time: 15 minutes
- Cook Time: 4 hours
Nutrition
- Calories: 350 kcal
- Sugar: 25g
- Sodium: 150mg
- Fat: 24g
- Carbohydrates: 35 g
- Protein: 4g