
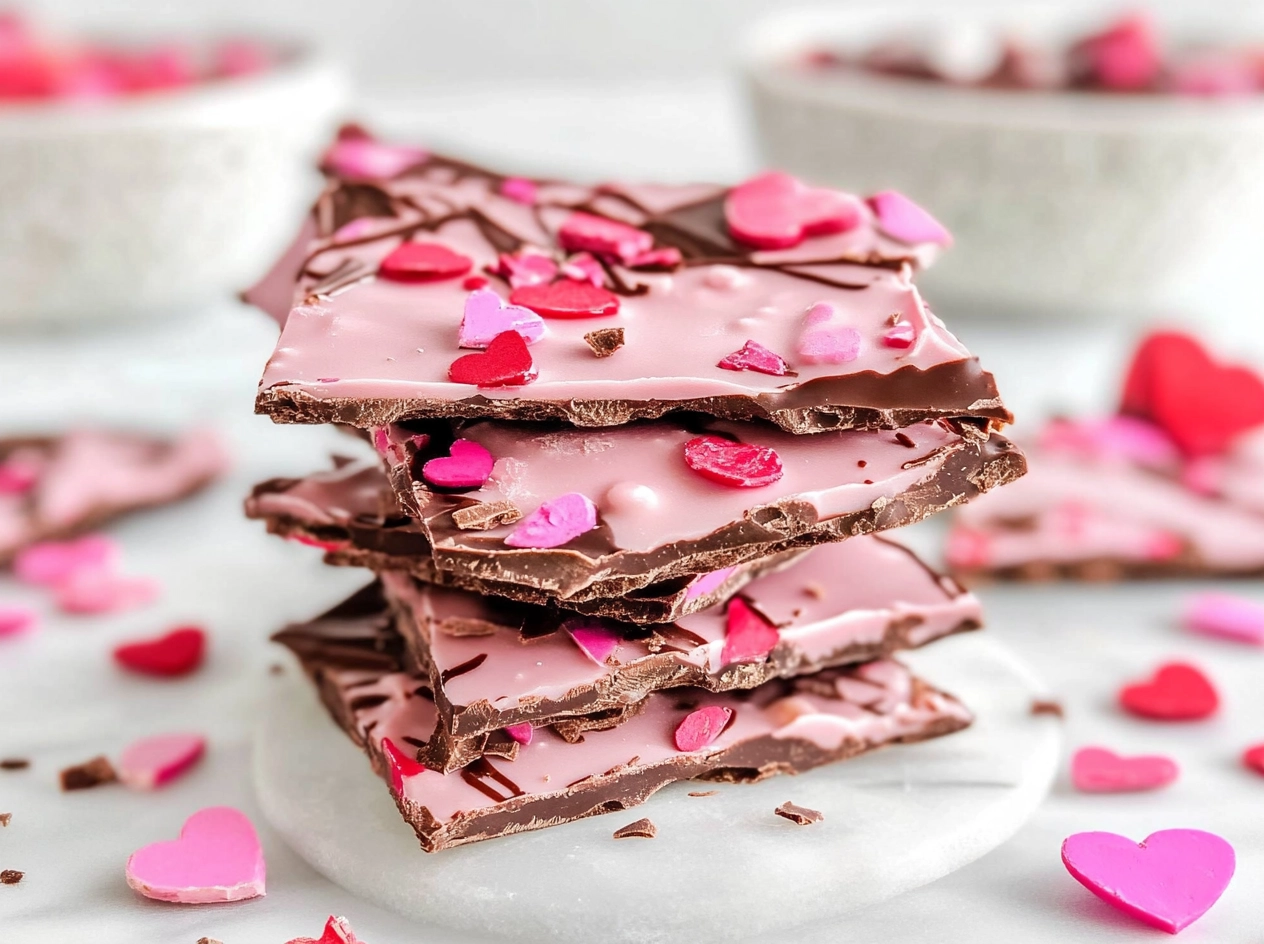
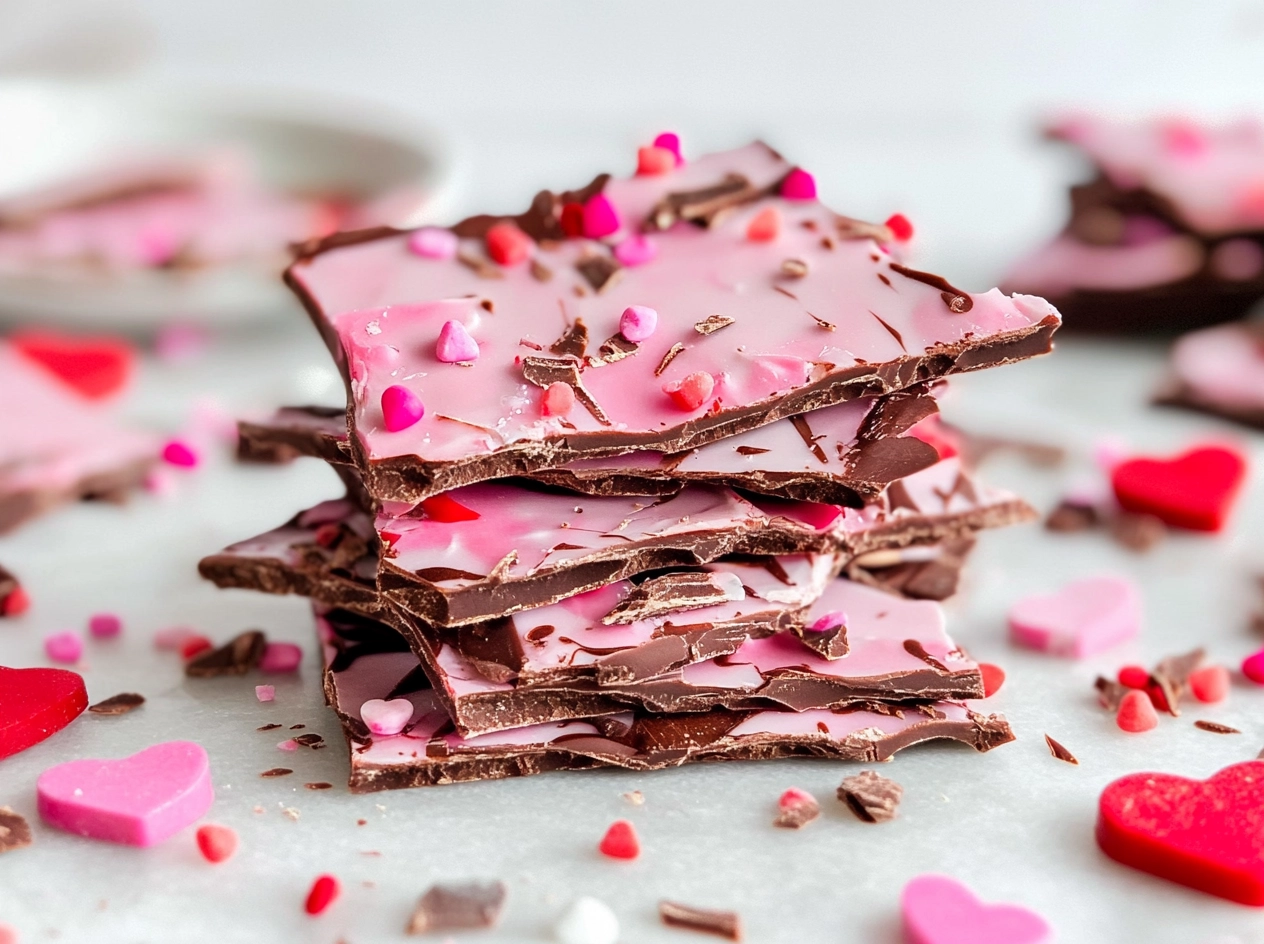
Valentine’s Chocolate Bark Recipe


Valentine’s Day is not just about roses and romantic dinners; it’s a celebration of love in all its forms, including the love we can show through food. Choosing the perfect Valentine’s dessert can elevate the day into something truly special. Instead of the usual fare from bakeries, why not opt for a homemade dessert? Making a delightful Valentine’s Chocolate Bark allows you not only to create something sweet and memorable but also to customize it just the way you like. This recipe combines the richness of chocolate with vivid toppings, making it as beautiful as it is delicious.
Convincing Reasons to Try Valentine’s Chocolate Bark
The Joy of Making a Homemade Dessert
Nothing beats the satisfaction of crafting a dessert from scratch. The process is incredibly simple, and the results are rewarding. Each bite of your own homemade chocolate bark carries a personal touch and a taste that a store-bought option can’t quite replicate. You’ll find joy in pouring melted chocolate onto a baking sheet, sprinkling your favorite ingredients, and witnessing it transform into a delectable treat.
Nutritional Benefits of Chocolate
Believe it or not, chocolate has its perks! Dark chocolate, in particular, is known for its health benefits, including antioxidants and heart-healthy properties. When you make your chocolate bark, you can choose high-quality chocolate, ensuring that you’re indulging in something both delicious and somewhat nutritious.
Versatility of the Dessert
One of the standout features of chocolate bark is its versatility. You can mix and match toppings, use different types of chocolate (like dark or white), and create combinations that fit every palate. This adaptability means that you can customize your bark to be uniquely yours, whether adding nuts, dried fruits, or perhaps even a hint of sea salt to balance the sweetness.
Valentine’s Chocolate Bark Recipe Overview
Brief Recipe Summary
This simple yet elegant Valentine’s Chocolate Bark involves melting chocolate, spreading it out, and sprinkling an array of toppings. After setting in the fridge, you’ll break it into pieces for a charmingly rustic dessert that’s perfect for sharing on love’s big day.
Key Ingredients Required
- 12 ounces of chocolate (dark, milk, or white)
- 1 cup of mixed nuts (almonds, walnuts, or pecans)
- 1 cup of dried fruits (cranberries, cherries, or strawberries)
- 1/4 cup of sea salt (optional for garnish)
- 1/4 cup of sprinkles (for that festive touch)
An Overview of the Process
The process is straightforward. You’ll begin by melting your chocolate, then pour it out onto a lined baking sheet. Next, the real fun begins: topping the chocolate with your chosen ingredients. Once it’s set, you’ll break it into pieces, and voila! You have a delightful Valentine’s treat ready to be enjoyed.
Preparing for the Recipe
Gathering the Ingredients
Before diving into the baking process, it’s crucial to gather everything you need. Here’s your ingredient list based on US measurements to ensure everything goes off without a hitch.
Ingredient List in US Measurements
- 12 ounces of chocolate (choose based on your preference: dark, milk, or white)
- 1 cup of mixed nuts (your choice!)
- 1 cup of dried fruits (cranberries, cherries, or strawberries work well)
- 1/4 cup of sea salt (optional, but recommended)
- 1/4 cup of sprinkles (a fun addition!)
Necessary Kitchen Tools
You’ll want to have a few key kitchen tools on hand:
- Baking sheet
- Parchment paper
- Mixing bowls
- Microwave-safe mixing bowl or double boiler
- Spoon or spatula for spreading
- Knife or mallet for breaking the bark
- Small bowl for mixing toppings (optional)
Setting the Cooking Environment
Ensure that your cooking area is clean and organized. It makes the process smoother and more enjoyable. Gather your ingredients and tools, and prepare to start melting that chocolate—a delicious aroma is on the way!
Step-by-Step Valentine’s Chocolate Bark Recipe
Preparation Steps
- Melt the Chocolate: Start by breaking the chocolate into pieces and placing it in a microwave-safe bowl. Melt it in the microwave in 30-second intervals, stirring in between until it’s smooth and shiny.
- Prepare the Baking Sheet: Line a baking sheet with parchment paper. This will prevent the chocolate from sticking and make cleanup easier.
- Pour the Chocolate: Once melted, pour the chocolate onto the parchment-lined baking sheet. Use a spatula to spread it evenly, leaving a thickness of about 1/4 inch.
- Add Toppings: This is where you can get creative! Sprinkle your chosen nuts, dried fruits, and any other toppings evenly over the chocolate. Take a moment to press down gently; this will help them stick.
- ** Chill**: Place the baking sheet in the refrigerator for at least 1 hour. You want the chocolate to set completely, so be patient!
- Break Into Pieces: Once set, remove the sheet from the fridge. Use a knife or a mallet to break the chocolate into pieces of your desired size.
Explanation of Cooking Processes
Melting chocolate can seem tricky, but keeping an eye on it as it melts will help prevent burning. Using a double boiler is an effective technique if you prefer not to use a microwave. The key is to heat the chocolate gently and avoid introducing any water into the mixture, as this can cause the chocolate to seize.
Guidance on Presentation
Once your chocolate bark is broken into pieces, consider how you wish to present it. You can arrange it on a decorative plate, place it in a gift box with lovely wrapping, or even use little bags for easy sharing. Don’t forget to add a touch of charm with some ribbons or a handwritten note for that special touch.
Safety Measures During Cooking
- Be cautious with hot ingredients: Always use oven mitts when handling melted chocolate, as it can be extremely hot.
- Keep an eye on the microwave: Overheating chocolate can quickly cause it to burn. Regular stirring is your best bet against a sugary disaster.
- Clean your tools: Ensure all tools, especially your mixing bowl, are dry to avoid any risks when melting chocolate.
Tips and Tricks for Perfect Chocolate Bark
Selecting the Perfect Chocolate
Choosing high-quality chocolate makes all the difference. Look for chocolate that has a high cocoa content and fewer additives. Brands that use cocoa butter rather than other fats will yield the best results.
Adding Inclusions and Flavors
Feel free to get imaginative with your toppings. You can add crushed cookies, pretzels, coconut flakes, or even a drizzle of caramel for added flavor. Experimenting with unexpected flavor combos can lead to delightful discoveries—be bold!
Storing and Serving
Once your Valentine’s Chocolate Bark is prepared, storing it properly is essential. Keep it in an airtight container to maintain its freshness, and store it in a cool, dry place. It can last several weeks this way—if it isn’t devoured first!
Customizable Variations of Valentine’s Chocolate Bark
Addition of Different Nuts
While mixed nuts are a classic choice, Sliced almonds, hazelnuts, or macadamia nuts can add delightful textures and tastes. Consider roasting them lightly beforehand to enhance their flavor.
Use of Different Types of Chocolate
Don’t limit yourself to just one type of chocolate! A combination of dark, milk, and white chocolate can create a visually appealing and deliciously diverse flavor profile.
Incorporation of Various Decorative Elements
In addition to sprinkles, think about seasonal items like heart-shaped candies, edible glitter, or cocoa powder dusting. A splash of color and creativity not only makes your bark look appealing but also adds another layer of fun to your dessert.
Anticipated FAQs
Can this Chocolate Bark recipe be made in advance?
Absolutely! Feel free to prepare your chocolate bark up to two weeks in advance. Just store it in an airtight container to keep it from breaking down or losing flavor.
What is the best way to store Chocolate Bark?
Store your chocolate bark in an airtight container in a cool, dry place. If you’re in a warm climate, consider refrigerating it, but allow it to reach room temperature before serving for the best taste and texture.
Can I use dark chocolate instead of milk chocolate for this recipe?
Yes! Dark chocolate will create a richer flavor profile and can be a great choice, especially for those who enjoy a deeper chocolate experience. Adjust the toppings according to your preference to balance the flavors.
Conclusion and Invitation for Engagement
As we wrap up this delightful Valentine’s Chocolate Bark recipe, remember how simple yet special this dessert can be. Not only does it offer a chance for creativity in the kitchen, but it also makes for a fantastic gift or treat for your loved ones. I encourage you to give this recipe a try, placing your own spin on it with various flavors and toppings.
If you do decide to take the plunge, please share your creations on social media! I’d love to see how you personalize your chocolate bark. Let love and sweetness flourish in your kitchen this Valentine’s Day!
Print
Valentineâs Chocolate Bark Recipe
- Total Time: 1 hour 20 minutes
- Yield: 12 servings 1x
- Diet: vegetarian
Description
A delightful homemade dessert for Valentine’s Day, combining the richness of chocolate with vivid toppings.
Ingredients
12 ounces of chocolate (dark, milk, or white), 1 cup of mixed nuts (almonds, walnuts, or pecans), 1 cup of dried fruits (cranberries, cherries, or strawberries), 1/4 cup of sea salt (optional for garnish), 1/4 cup of sprinkles (for that festive touch)
Instructions
Melt the Chocolate: Start by breaking the chocolate into pieces and placing it in a microwave-safe bowl. Melt it in the microwave in 30-second intervals, stirring in between until it’s smooth and shiny., Prepare the Baking Sheet: Line a baking sheet with parchment paper. This will prevent the chocolate from sticking and make cleanup easier., Pour the Chocolate: Once melted, pour the chocolate onto the parchment-lined baking sheet. Use a spatula to spread it evenly, leaving a thickness of about 1/4 inch., Add Toppings: Sprinkle your chosen nuts, dried fruits, and any other toppings evenly over the chocolate. Press down gently to help them stick., Chill: Place the baking sheet in the refrigerator for at least 1 hour to let the chocolate set completely., Break Into Pieces: Once set, remove the sheet from the fridge. Use a knife or a mallet to break the chocolate into pieces of your desired size.
Notes
Store your chocolate bark in an airtight container in a cool, dry place. It can last several weeks if stored properly.
- Prep Time: 15 minutes
- Cool Time: 1 hour
- Cook Time: 5 minutes
- Category: dessert
- Method: no-bake
- Cuisine: American
Nutrition
- Serving Size: 1 piece
- Calories: 200
- Sugar: 15g
- Sodium: 50mg
- Fat: 10g
- Saturated Fat: 5g
- Unsaturated Fat: 4g
- Trans Fat: 0g
- Carbohydrates: 25g
- Fiber: 2g
- Protein: 3g
- Cholesterol: 0mg
Keywords: Valentine's Day, chocolate bark, homemade dessert, sweet treat